Reserved I/O Configuration
Quick Configuration
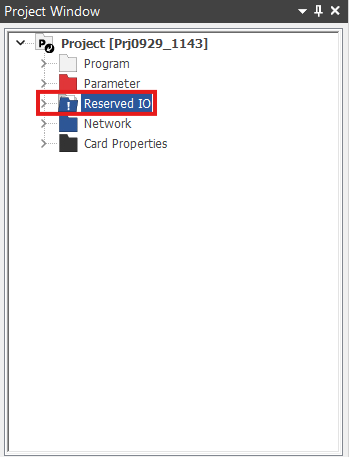
- In the Project Window, double left-click Reserved IO.
- The following window will appear:


- Right-click and left-click Base setting.
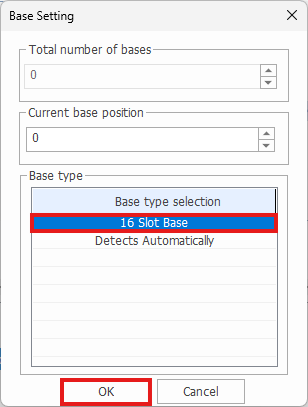
- Select the proper base setting for the PLC and left-click OK.
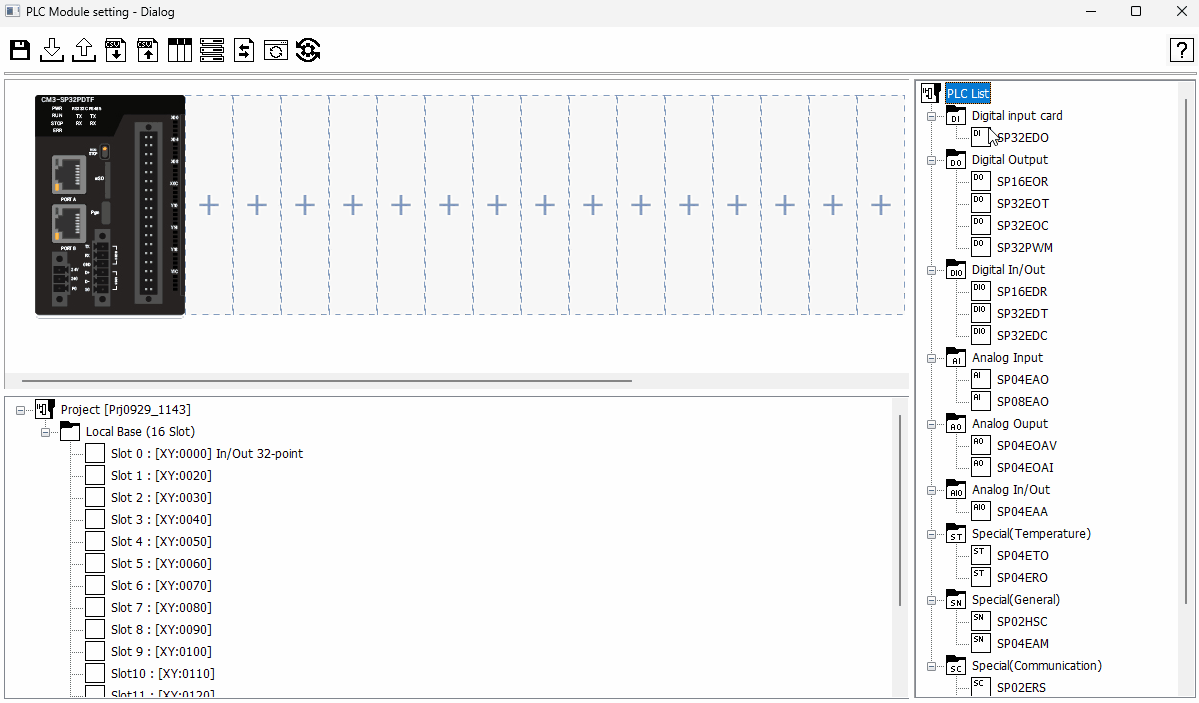
- Drag-and-drop any of the selected modules onto the chassis.
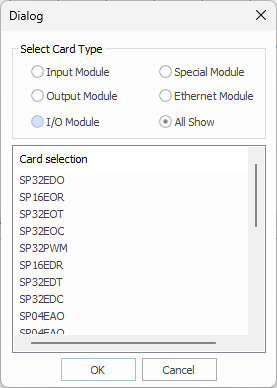
- Optionally, double left-click on the + icon to bring up the module selection menu.
Information
Module Image Selection
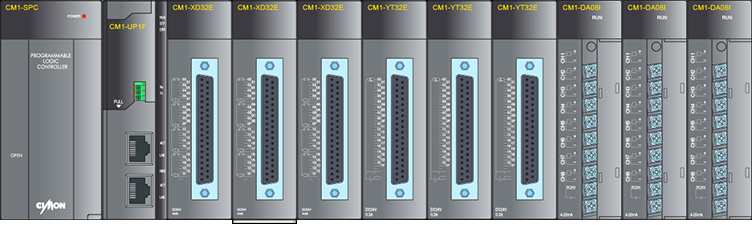
Displays the module composition according to the user's settings.
Module
Mounting
- Right-click and select Insert Module.
- Double-click the empty slot image.
- Double-click the module from CIMON PLC module list.
- In this case, the module will be inserted to the leftmost empty slot.
- Drag-drop from the CIMON PLC module list.
- In this case, the selected module’s title and image will appear and it will be inserted where it’s dropped.
- Initial base type is automatic detection and can be installed after changing the base type.
Replacing
- Right-click and select Replace Module.
- Drag-drop from the CIMON PLC module list.
- Power and CPU cannot be replaced.
- CPU can only be changed from the Project Properties.
Removing
- Right-click and select Remove Module.
- Select a module and press the Delete key.
- User can move between modules by using arrow keys and delete it.
Tips
- Tips while inserting the modules:
- Consecutive module insertion:
- Select a module on the module image view.
- While holding left shift, click the location where the last module will be inserted. (If an empty slot is selected, using this feature will empty the all modules to the point of the cursor).
- This feature is only available in a base.
- Select a module on the module image view.
- Relocating the module:
- Select the target module.
- Click the destination while holding Control.
- Consecutive module insertion:
Special Module Configuration
- Double-click the module image to configure.
- Double-clicking the CPU will open the parameter window.
- In this case, the Module Setting window will be minimized.
- When an image is selected, there will be an indicator of the image in the module tree.
- The special card configuration window is derived from "Special Card Init" program.
- Double-clicking the CPU will open the parameter window.
Base Type Configuration
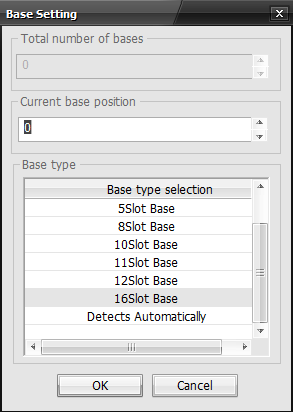
- CM3 CPUs use 12 Slot Base.
- The Plus CPU uses 16 Slot Base.
I/O Reservation Points
- Right-click on the empty slot or the module.
- The I/O reservation point options are 0, 16, 32, and 64 points.
- I/O reservation points have a higher priority than the default I/O reservation point on the expansion module.
- If a user configures the I/O reservation point, the user’s setting will be maintained.
- Example: If the user set only 32 points by using IO Reservation Point feature, and then Input module with 64 points is mounted to the slot, PLC will only recognize the 32 points.
- If a user configures the I/O reservation point, the user’s setting will be maintained.
- I/O reservation points have a higher priority than the default I/O reservation point on the expansion module.
- The I/O reservation point options are 0, 16, 32, and 64 points.
- Allows the user to reserve the number of points that are less than the module’s actual points.
- Example: Reserving 16 points for an output module with 32 points.
- The default number of points of special cards and the empty slot is 16 points.