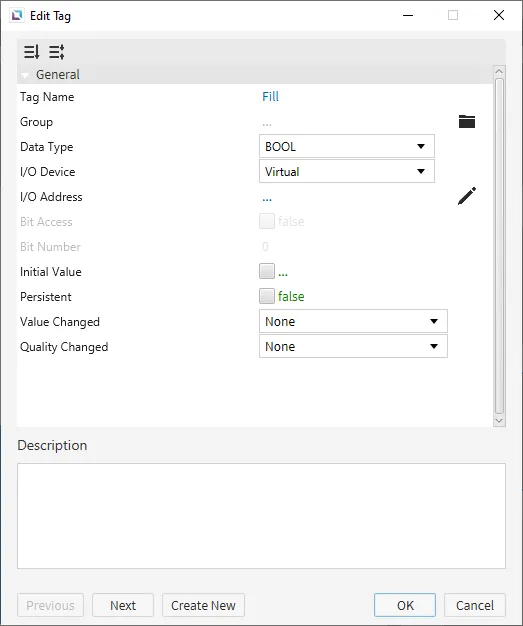
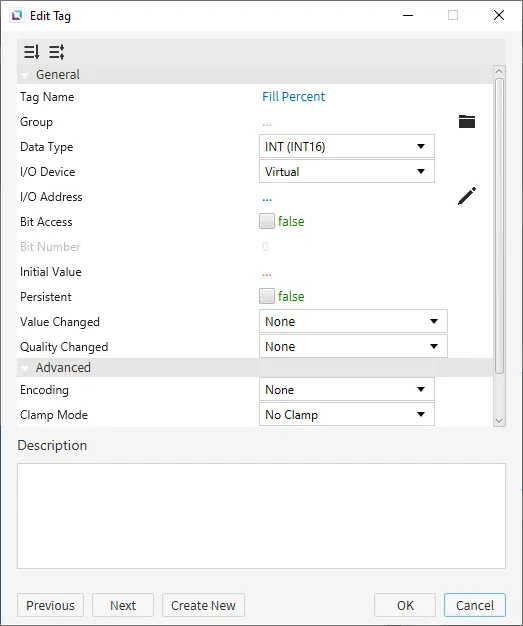
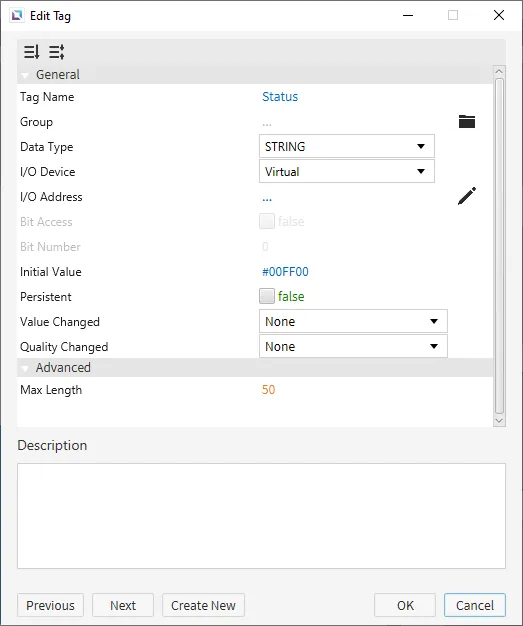
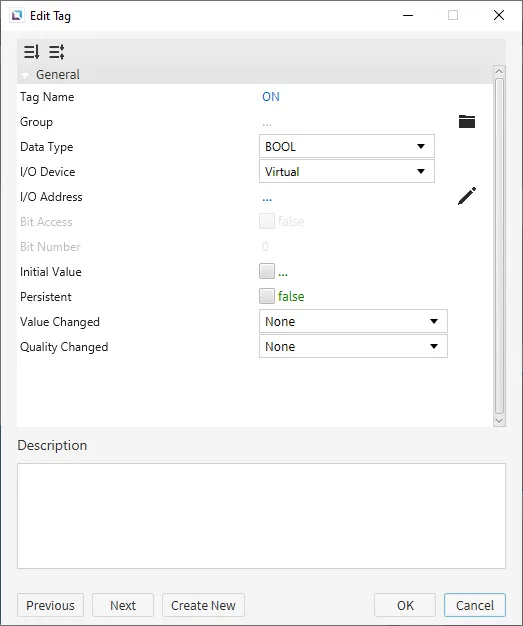
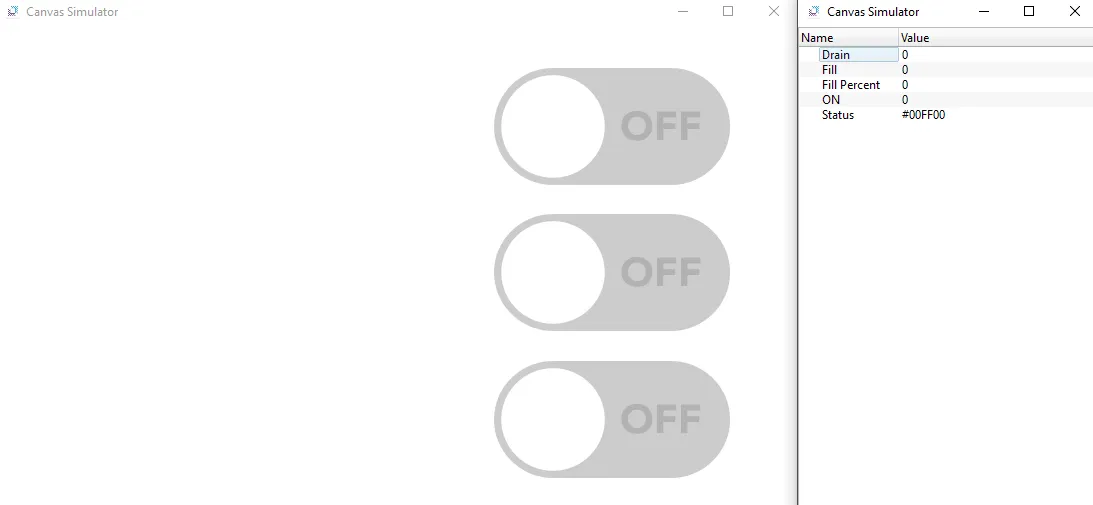
Create five tags. The first tag will be named "Fill" and will be a BOOL tag. The second tag will be named "Fill Percent" and will be an INT16 tag. The third tag will be named "Status" and will be a STRING tag. The default value will be '#00FF00'. The fourth tag will be named "ON" and will be a BOOL tag. The fifth tag will be named "Drain" and will be a BOOL tag. Set the initial values for each tag as shown below.
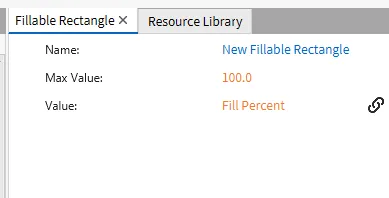
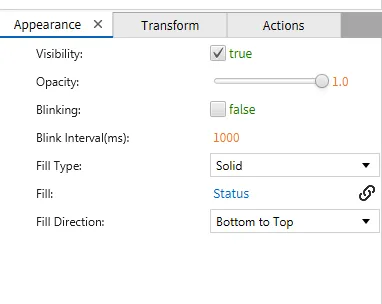
Create a fillable rectangle object on the screen. Bind the tag "Fill Percent" to the Value and bind the tag "Status" to the Fill parameter.
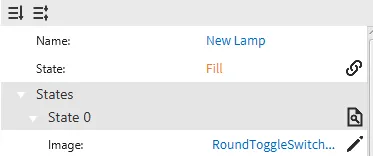
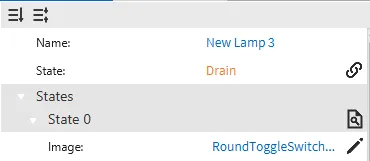
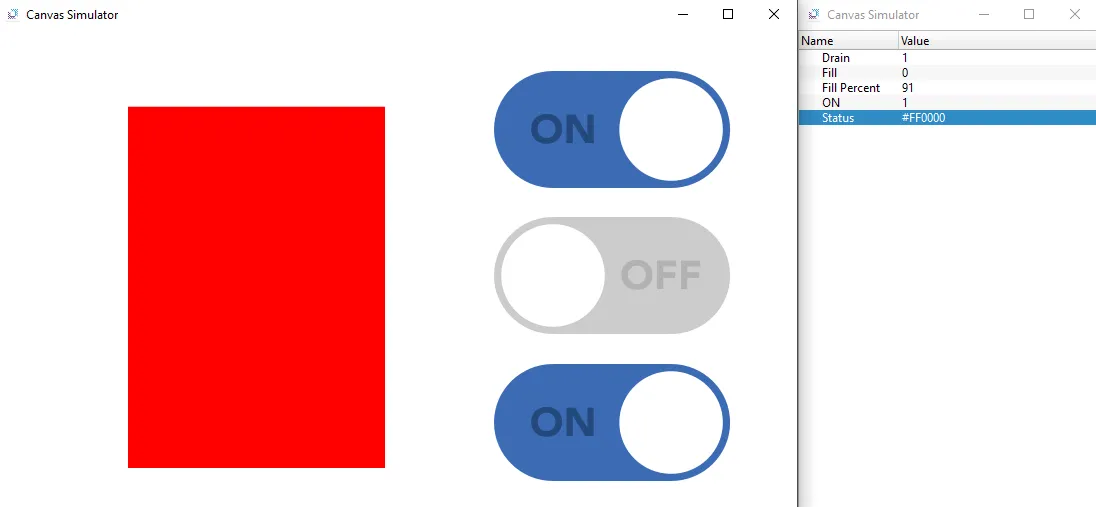
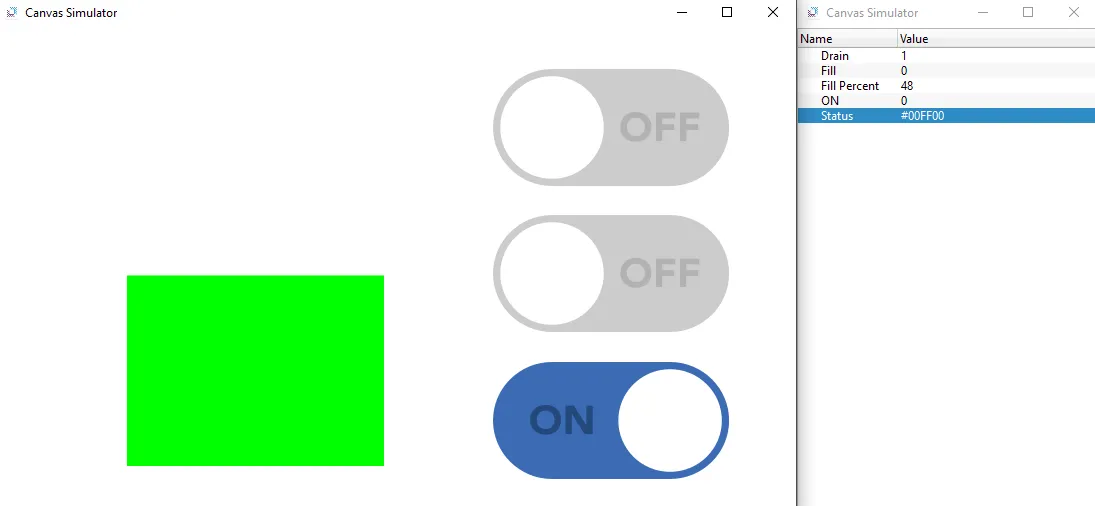
Create 3 Switch/Lamp objects. To the first one, bind the "ON" tag. To the second one, bind the "Drain" tag. To the third one, bind the "Status" tag.
Create a script. Click on Tools > Script Editor to open the Script Editor. Click New to create a new script. Name the script "Fill Tank" and click OK. The script should be a manual script. Copy and paste the following code into the script:
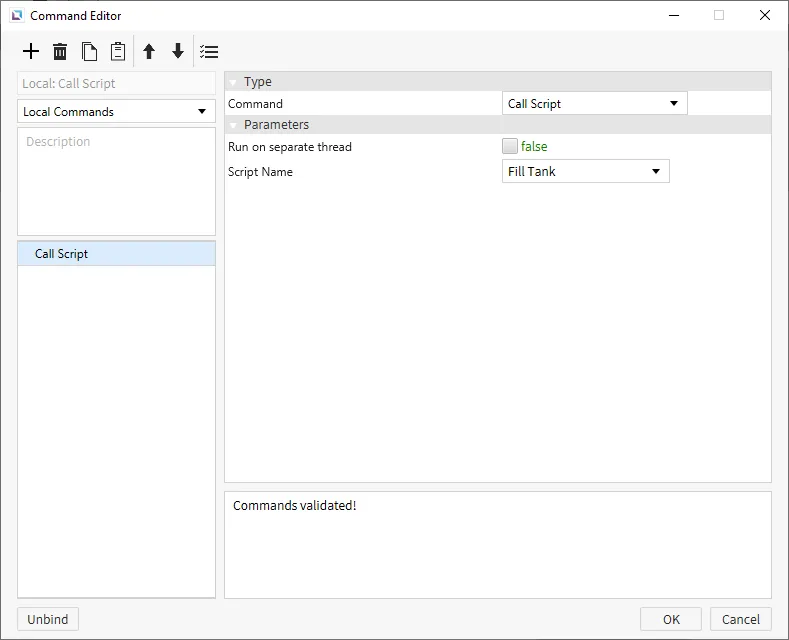
On the Switch/Lamp object that is bound to the "ON" tag, go to the Actions tab. Under On Press, create a "Call Script" command. Select the "Fill Tank" script from the list and click OK.
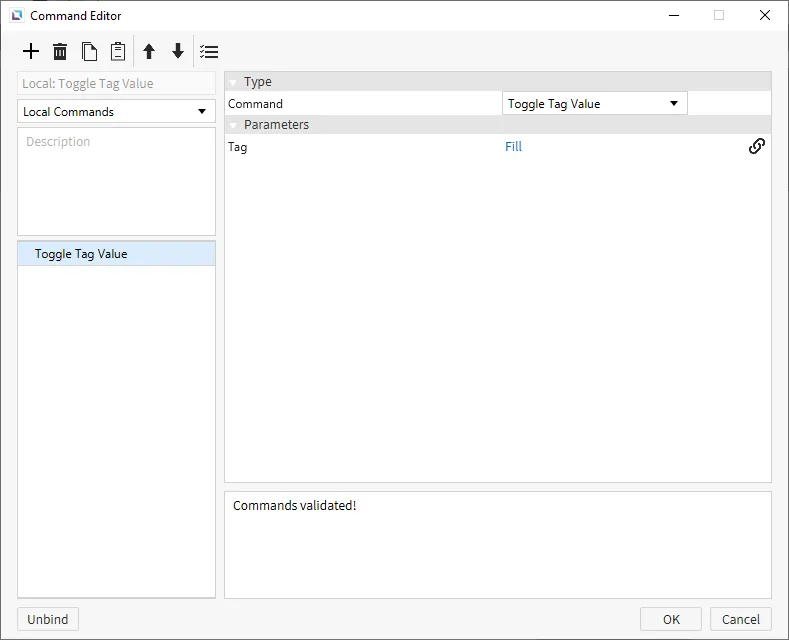
For the other two Switch/Lamp objects, create an action on the first one to toggle the tag bound to the Switch/Lamp object. Create an action on the second one to toggle the tag bound to the Switch/Lamp object.
Fillable Rectangle Runtime
Click Tools > Launch Simulator to launch the Canvas Simulator.
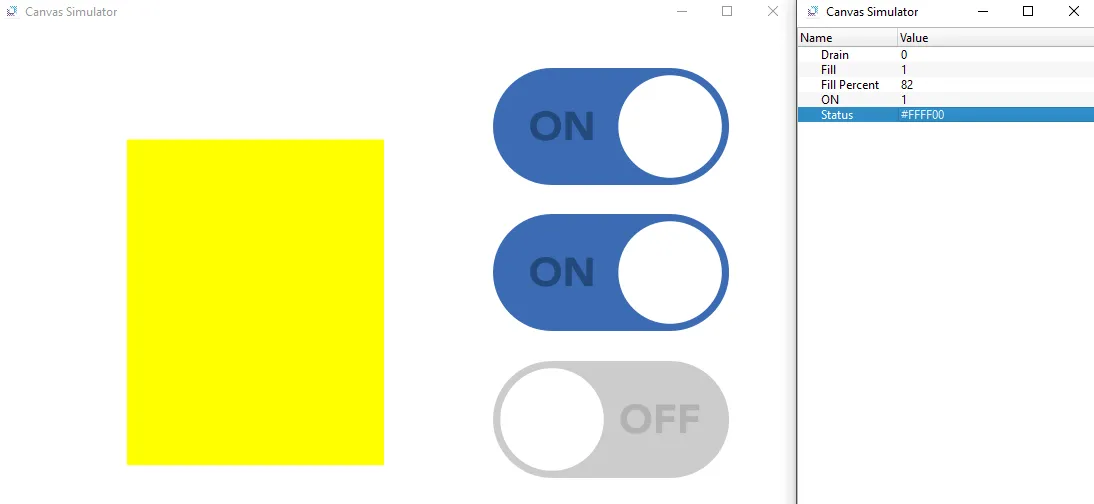
Toggle the ON Switch/Lamp. Once that one is toggled, toggle the Fill Switch/Lamp. The Fillable Rectangle should start to fill. The fillable rectangle will switch to yellow and red depending on how full the tank is.
Once the tank is full, turn off the Fill Switch/Lamp and toggle the Drain Switch/Lamp. The Fillable Rectangle should start to drain. The fillable rectangle will switch to yellow and green depending on how full the tank is.
Toggle the ON Switch/Lamp to stop the tank from filling or draining. The Fillable Rectangle should stop filling or draining.