External Network Connection
Connecting to Xpanel on External Network
This is a guide on setting up port forwarding for TCP and UDP. The goal is to use TCP and UDP on an ADTRAN NetVanta 3140 router to remotely access an Xpanel from an external network.
Important note: this guide is based specifically on CIMON's network environment setup and serves as an example. Your exact IP addresses, zones, and configurations may differ depending on your setup. However, the general process and protocols (TCP/UDP) remain consistent.
CIMON is not responsible for network setup or configuration.
Port Forwarding
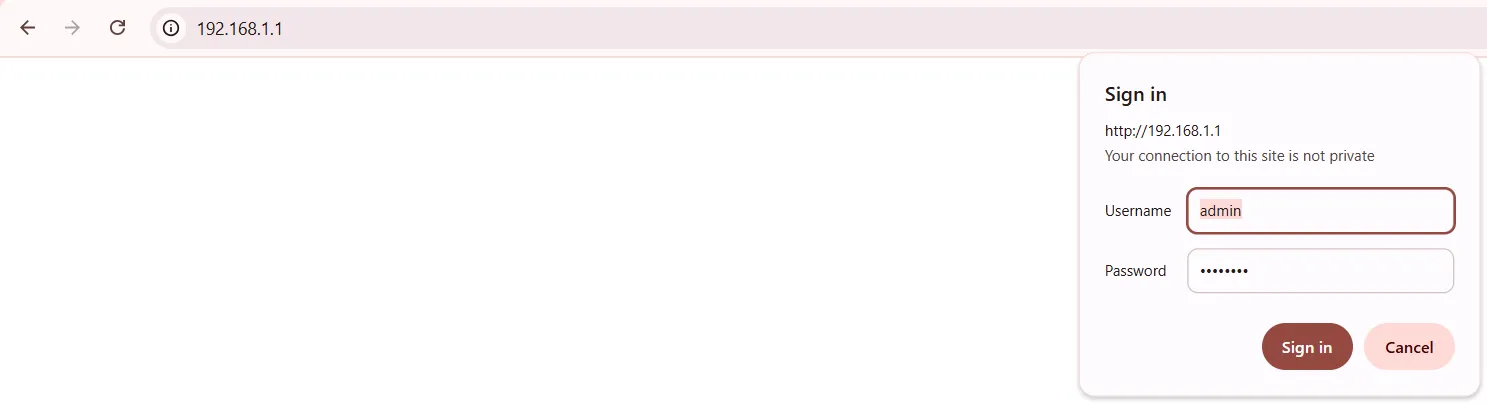
- Log into your router. Enter your router’s internal IP (192.168.1.1, for example) into your web browser. Log in using your admin credentials.
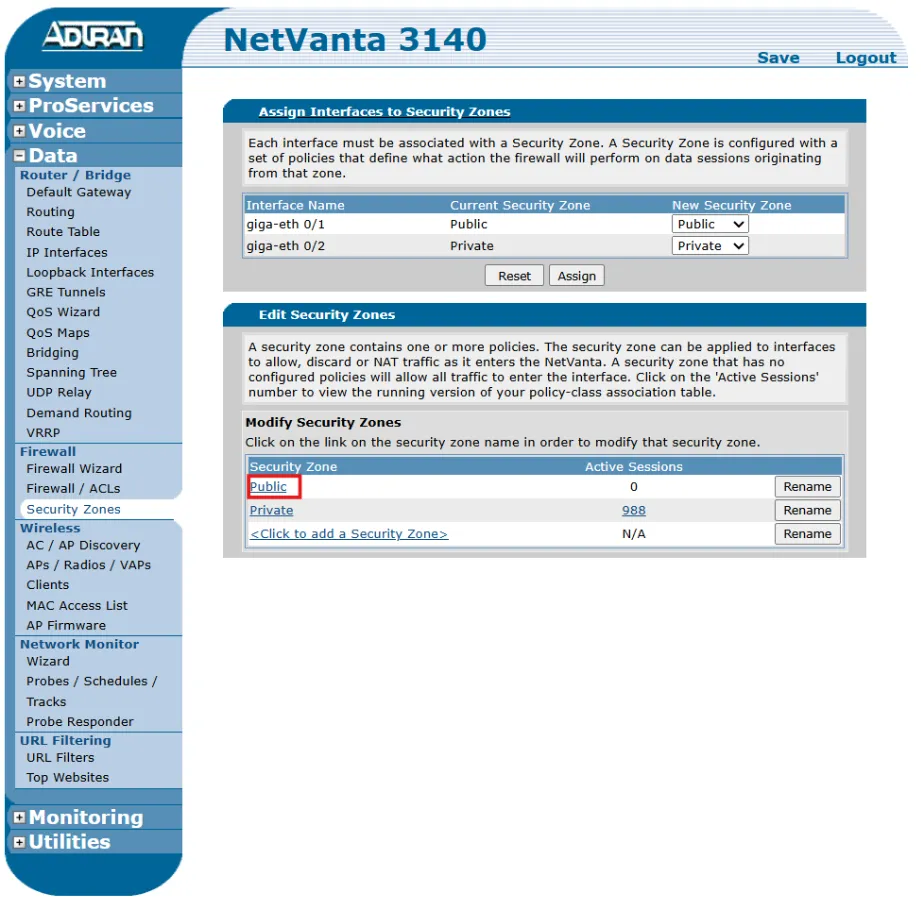
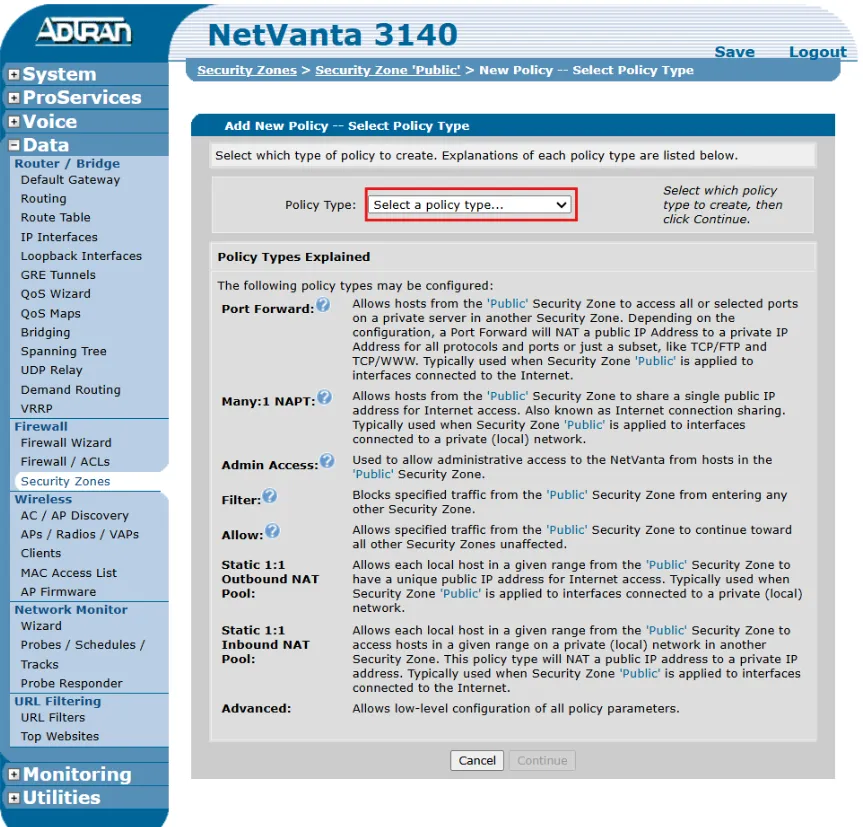
- Navigate to Security Zones. On the router's homepage, click on: Data > Router / Bridge > Firewall > Security Zones.

- Under the Security Zones section, click on the Public security zone to open its settings.
- Add a new port forwarding policy by clicking Add Policy to Zone 'Public' button. This creates a new firewall rule.
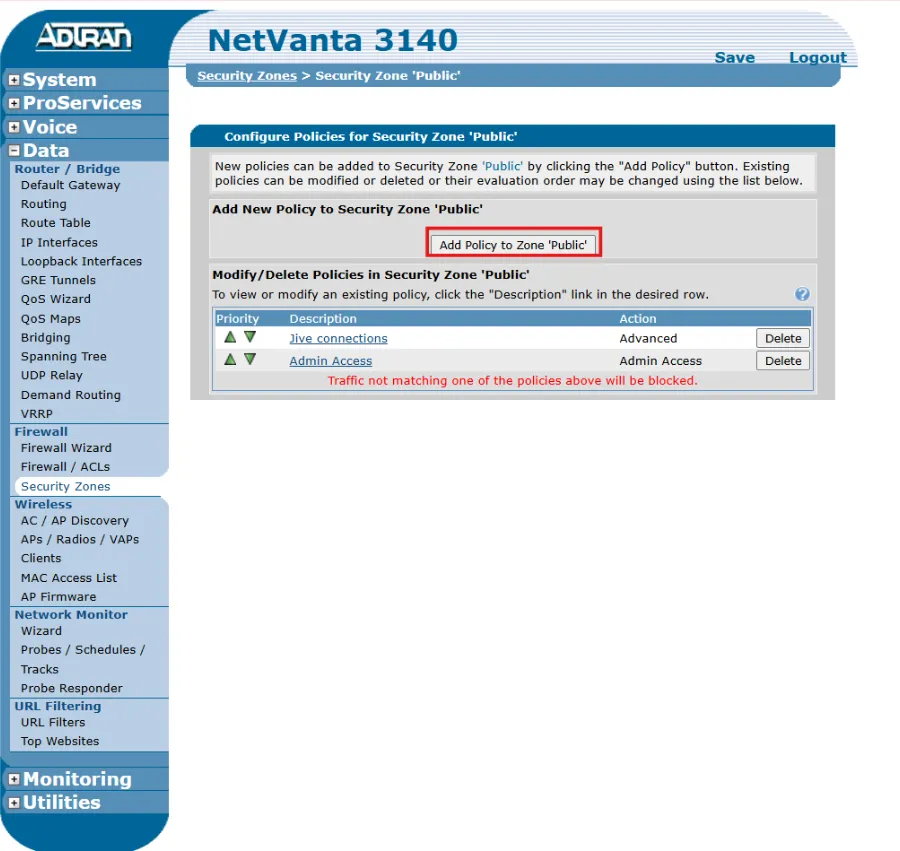
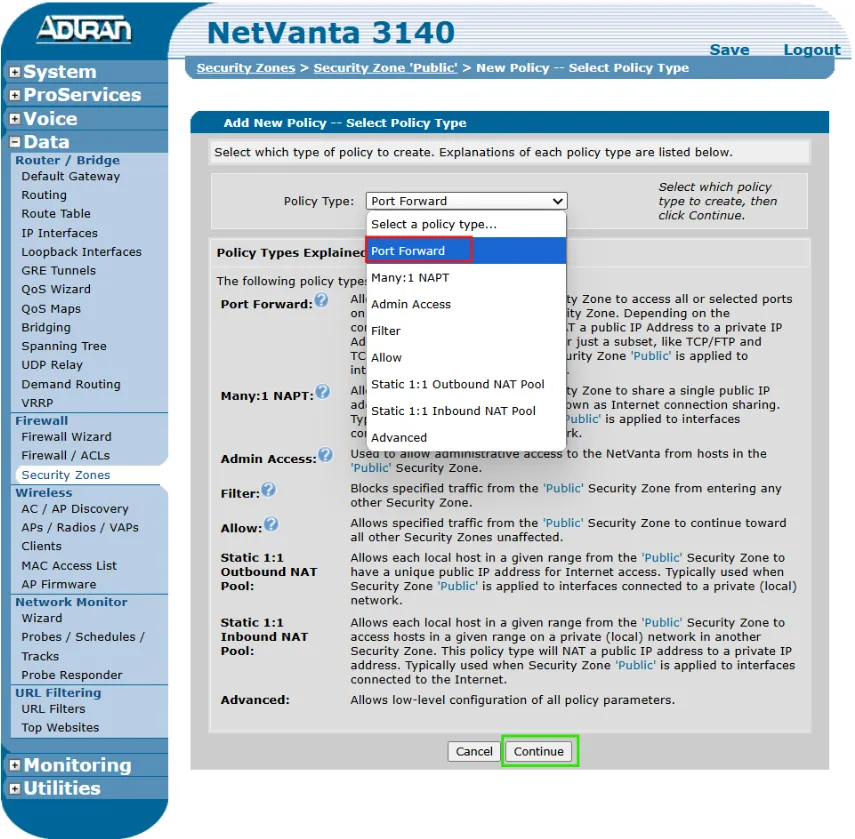
- Under the Policy Type drop-down menu, select Port Forward and click Continue.
- Configure the port forwarding details by the following:
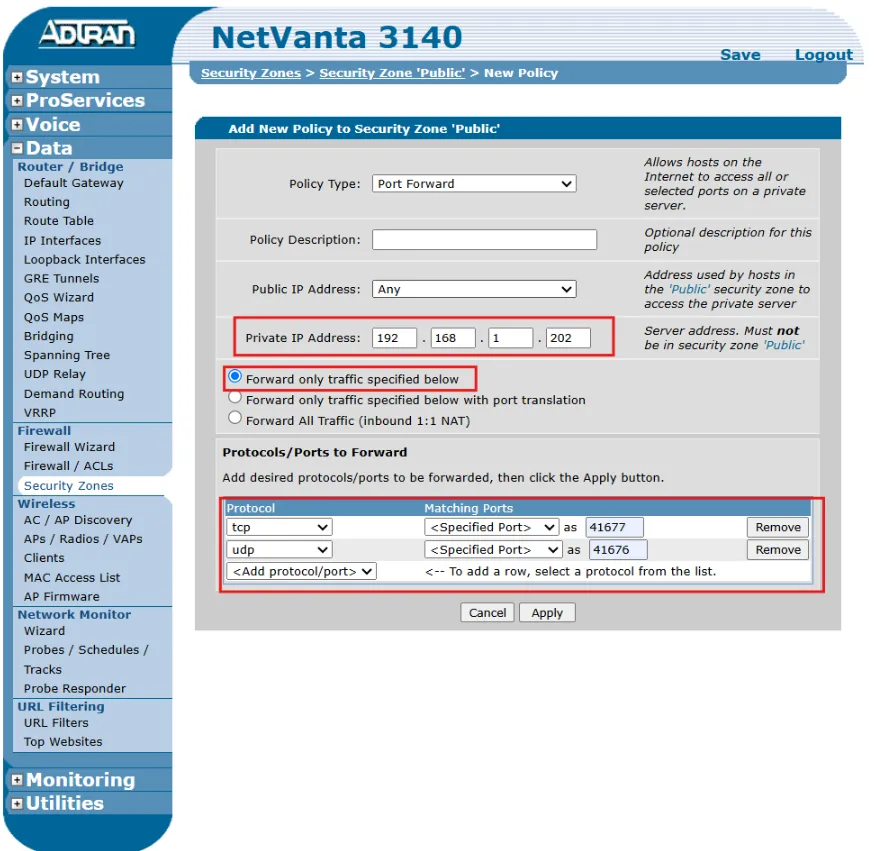
In the new policy configuration, enter the Private IP Address of the target device.
In our example, the IP is 192.168.1.202, which belongs to our HMI running Canvas Software.
Select the Forward only traffic specified below option.
Under the Prtocols/Ports to Forward section, select TCP and enter Specified Port as 41677.
Add the UDP port with the Specified Port as 41676.
Click Apply once the TCP and UDP ports have been entered correctly.
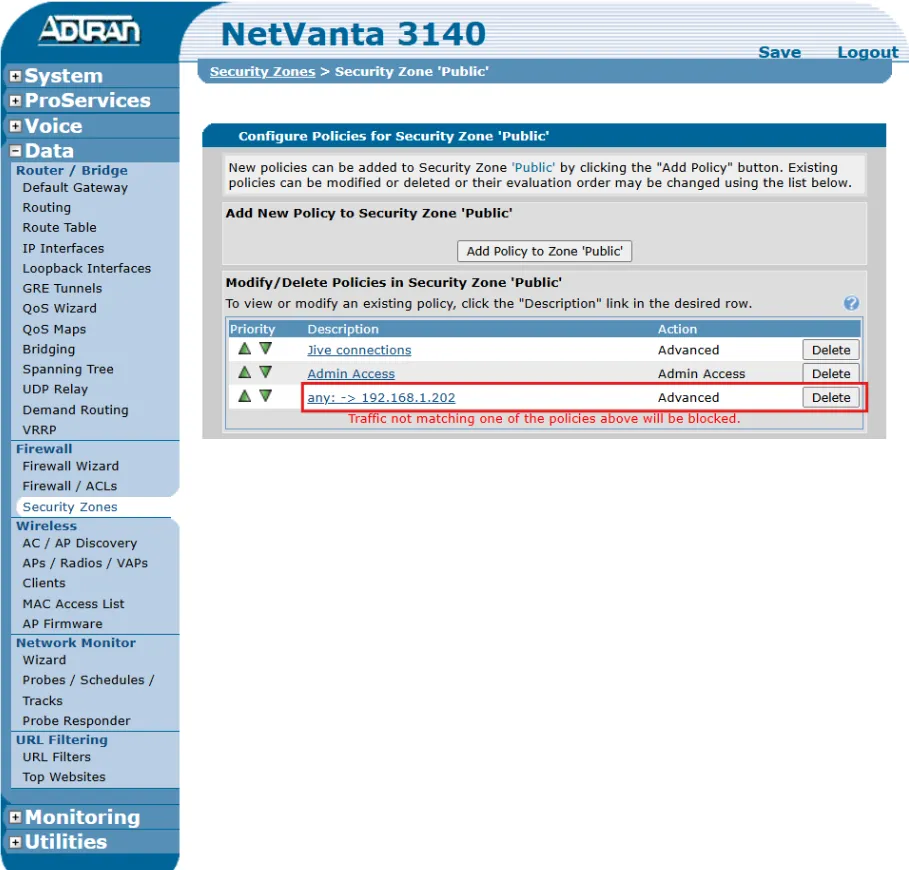
- After applying settings, confirm your policy appears under the Modify/Delete Policies in Security Zone 'Public' section.
You should now see your newly added policy (any: -> 192.168.1.202) listed.
This indicates your policy to forward incoming traffic from any public IP address to your internal HMI device (192.168.1.202) using the specified ports has been successfully created.
Canvas Configuration
Once port forwarding has been successfully configured on your router, you can now remotely connect to your HMI using Canvas. This section walks through how to manually add a device using its public IP address.
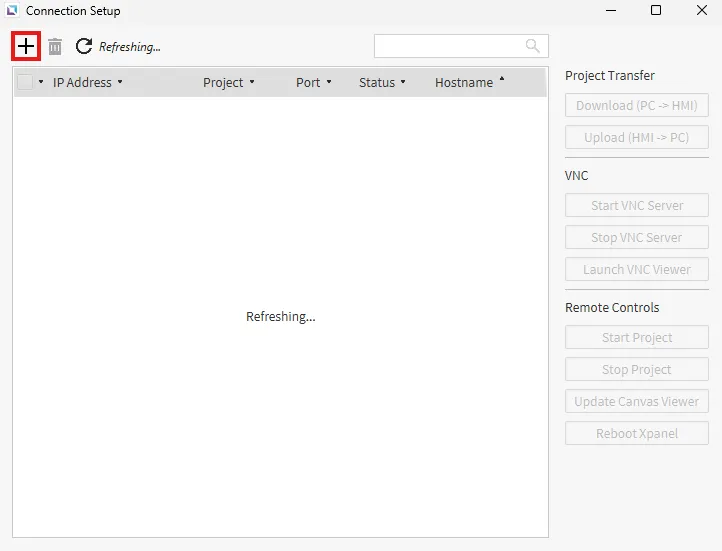
- Open the Connection Setup menu in Canvas and manually add a new device.
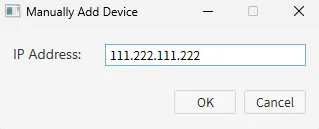
- Manually add the public IP address. To find your public IP address, in your web browser, type what's my ip. Copy the number displayed. Our example uses 111.222.111.222.
- Confirm the devices is in the list.
![]()
You will now see the device listed by IP address, indicating a successful connection to the remote HMI.
Final Notes
- Ensure your firewall settings allow outbound TCP/UDP traffic on the ports used (e.g., 41677 for TCP, 41676 for UDP).
- If the device does not appear after manual entry, double-check that port forwarding is active and your HMI is powered on and connected to the internet.
- Use the VNC/RDP or Remote Control options on the right side of the Connection Setup window to manage or view the HMI remotely once the connection is established.