Runtime Introduction
Runtime Description
Users have the option to test their Canvas project before deploying it on an HMI. Users can utilize the Simulator to test object functionality or the Online Simulator to test I/O device communication. For example, users can communicate with the CICON simulator through the Online Simulator in Canvas.
Users are also able to interact with the HMI through Canvas. Users can upload and download a project from and to the HMI through Canvas.
Lastly, the HMI screen can be projected onto the computer through Virtual Network Computing (VNC) or Remote Desktop Protocol (RDP).
Runtime Functionalities
Runtime Download / Upload
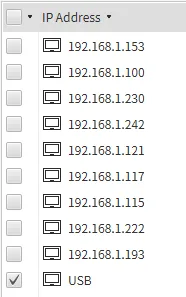
In order to run the project on a CIMON HMI, users must first set up the connection with the Xpanel. To do this, users must go to Tools > Connection Setup or, on the toolbar, go to Open Connection Setup…. This will open the Connection Setup window, which allows users to connect to the HMI via Ethernet, USB-A to USB mini-B, or USB-A to USB-C. If the Xpanel is connected via Ethernet, it will appear with its respective IP address. If the Xpanel is connected via USB mini-B or USB-C, it will appear as a USB device.
The USB mini-B or USB-C connection is treated as an Ethernet connection. The USB mini-B or USB-C port will utilize the CPU's DHCP server to connect directly to the Xpanel without a need for third-party software to facilitate the connection.
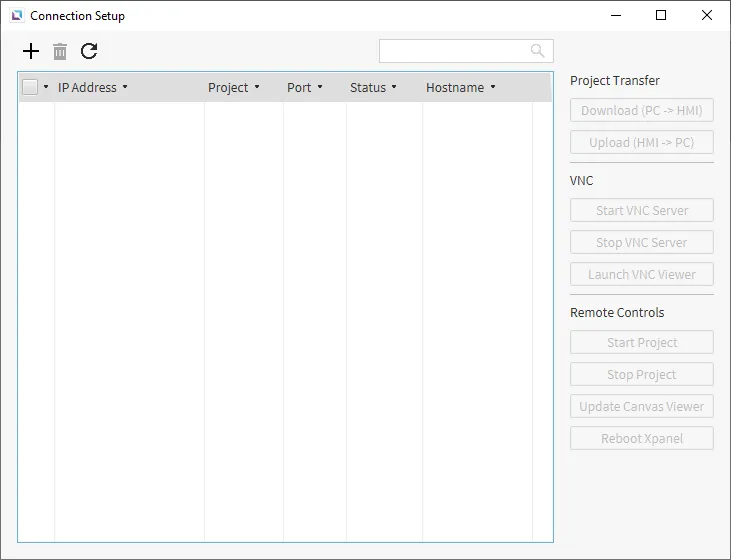
In order to transfer the project to runtime, within the Connection Setup page, select the Xpanel that will be used for the project. Once selected, the buttons on the right side of the page will become clickable.
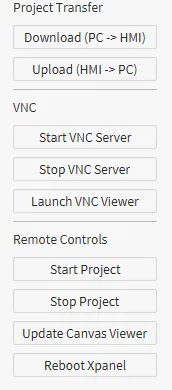
Click on the Download (PC → HMI) button; this will begin transferring the project to the HMI. Click OK on any popups. After waiting, the project will appear on the HMI.
Click on the Upload (HMI → PC) button; this will begin transferring the project from the HMI to the computer. Click OK on any popups. After waiting, the project on the HMI will be uploaded to the computer.
Xpanel Runtime
When a user downloads a project to the HMI, it will automatically open the project when the download is finished. The project will automatically be loaded if the Xpanel is power-cycled or rebooted. There are no limitations on the Xpanel during runtime.
The Xpanel's screen can be mirrored on a computer through Virtual Network Computing (VNC) or Remote Desktop Protocol (RDP). For a guide on how to connect using VNC or RDP, refer to the Remote Connection section.
VNC will only be available on the eXT2 devices; if using an eXT or nXT, an RDP instance will run instead. Neither option will be available on the eXT04.
Settings Page
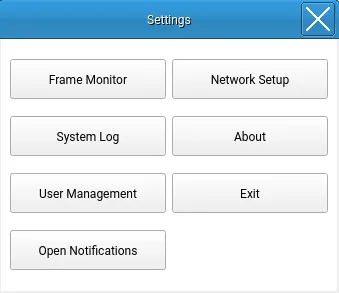
Users may interact with the settings during runtime. To open the settings menu, use the long press or three-corner method.
- The Xpanel settings menu has the following options:
- Frame Monitor: Opens a window to monitor I/O devices connected to the Xpanel.
- System Log: Opens a window to display activity that occurred on the Xpanel.
- User Management: Opens a login window for the Identity and Access Management feature.
- Open Notifications: Opens a window to display notifications that occurred during project runtime.
- Network Setup: Opens a window to configure the Xpanel network settings.
- About: Displays the Canvas Viewer version. Software acknowledgements can be viewed too.
- Exit: Suspends the project runtime and opens the Control Center menu.
Runtime Settings
After clicking the Exit button, the Control Center screen will appear and suspend the project runtime. There are two options: Canvas Viewer and Settings. Clicking Canvas Viewer will resume the project runtime.
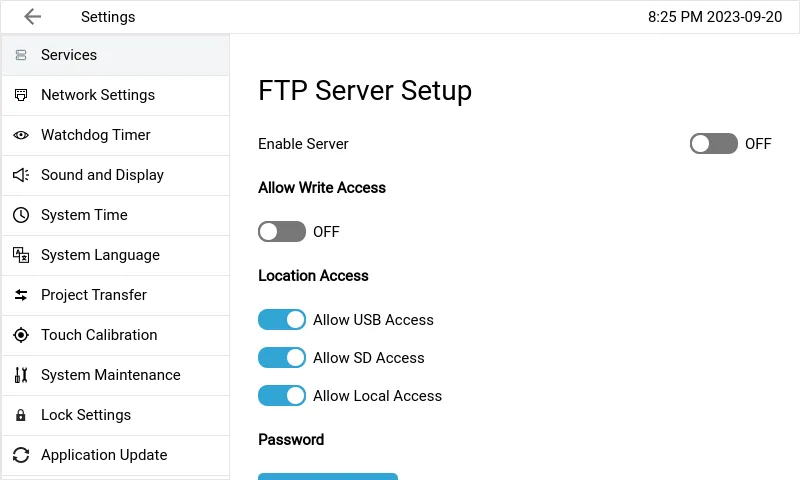
Clicking Settings will open the Xpanel settings menu. Here, users can set up Server Settings, Network Settings, Sound and Display, Project Transfer, and Language and Region. System time and many other windows will directly change the settings of the Xpanel itself.
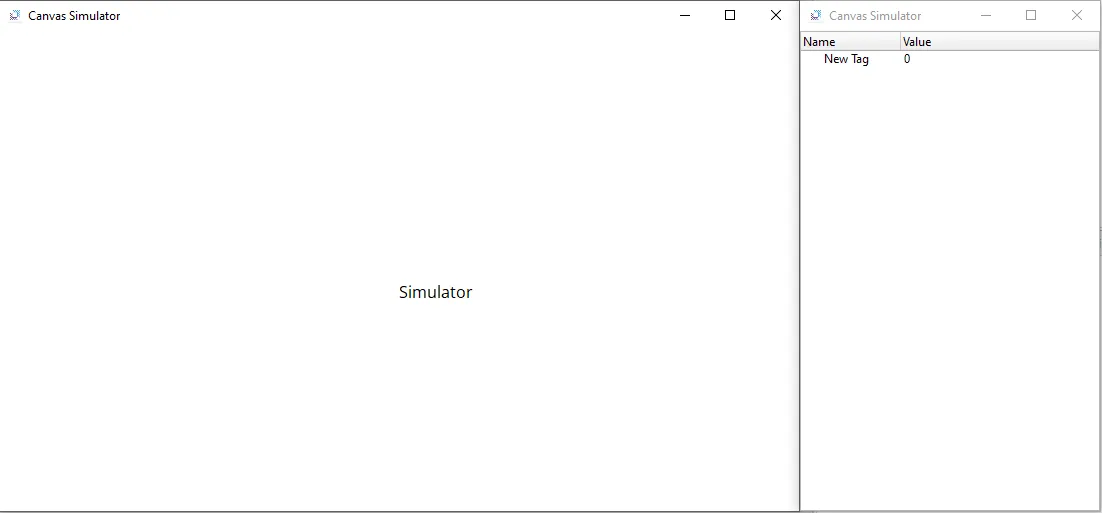
Simulator
An HMI is not required to test the functionality of a project. The Canvas simulator will be able to help debug and test a project's functionality. Users can also directly change tag values to test the functionality of specific functions dependent on tag values. By going to Tools > Launch Simulator or clicking the Launch Simulator button on the Toolbar, users will be able to run the project on the computer and test the functionality of the project.
Users can also test with an Online Simulator; this allows users to test the functionality of I/O Devices and Data Servers without the need for a PLC, HMI, or any other I/O devices. To run the Online Simulator, go to Tools > Launch Online Simulator or click the Launch Online Simulator button within the toolbar. Some functionality not available in the offline simulator will be available in the online simulator.
A warning will appear in the event that simulator is missing files that are needed to run simulator mode.
Not all features will function in one or both of the Simulators; some functionality will only occur when the project is installed on the HMI.
The Online Simulator will only run for 2 hours before automatically closing the runtime.