Alarm Exercise
Exercise
Exercise: Checking the Alarm Contents with Alarm Summary
Please follow the below exercise to understand Alarm functionality.
Configuration
The following configuration is used to set up this exercise.
Tag Configuration
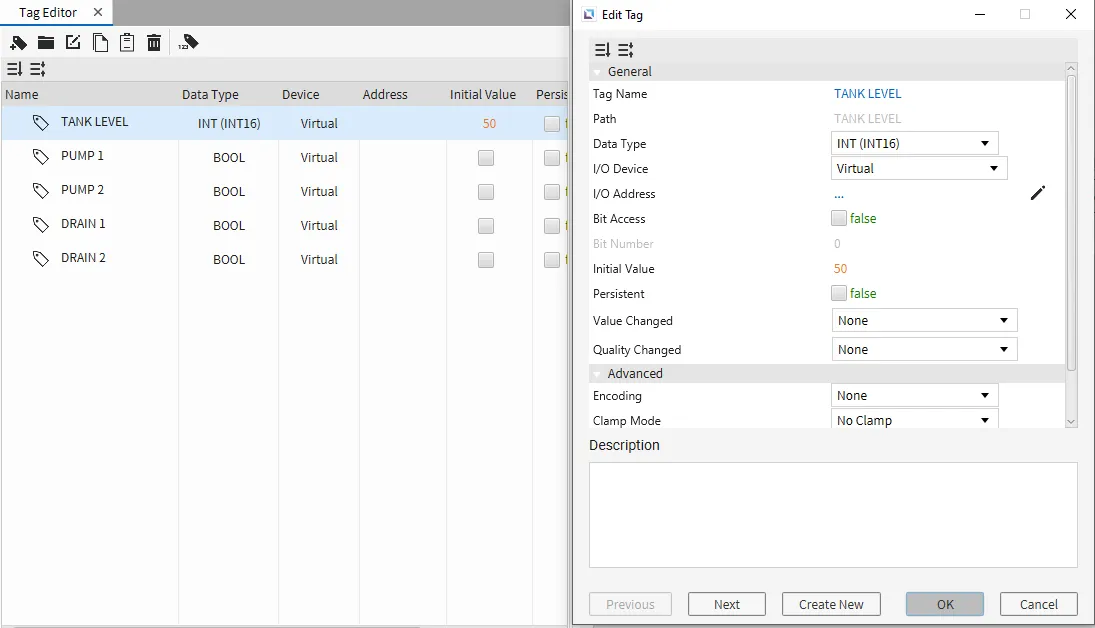
- Create the following tags:
- TANK LEVEL
- Data type: INT (INT16)
- Initial value: 50
- PUMP 1
- Data type: BOOL
- Initial value: false
- PUMP 2
- Data type: BOOL
- Initial value: false
- DRAIN 1
- Data type: BOOL
- Initial value: false
- DRAIN 2
- Data type: BOOL
- Initial value: false
- TANK LEVEL
Alarm Configuration
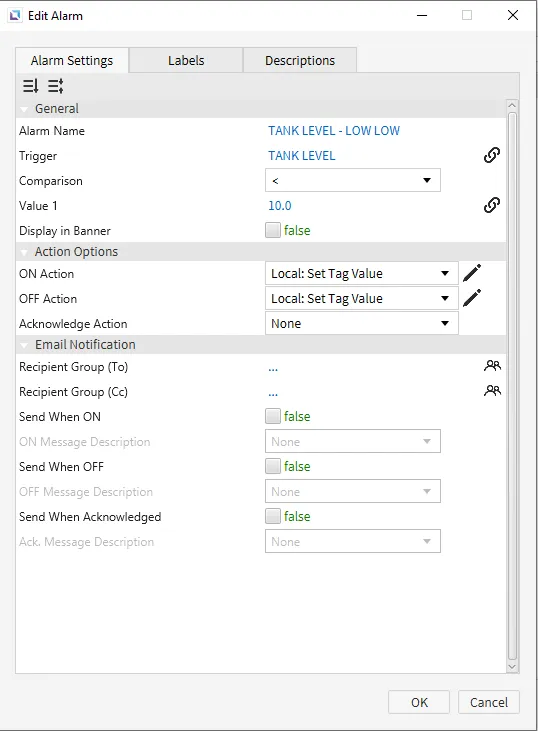
- Click Tools > Alarm Editor to bring up the Alarm Editor window. Configure the following alarms for the TANK LEVEL tag:
- TANK LEVEL - HIGH HIGH
- Comparison: Greater than (>)
- Value 1: 90
- TANK LEVEL - HIGH
- Comparison: Greater than (>)
- Value 1: 80
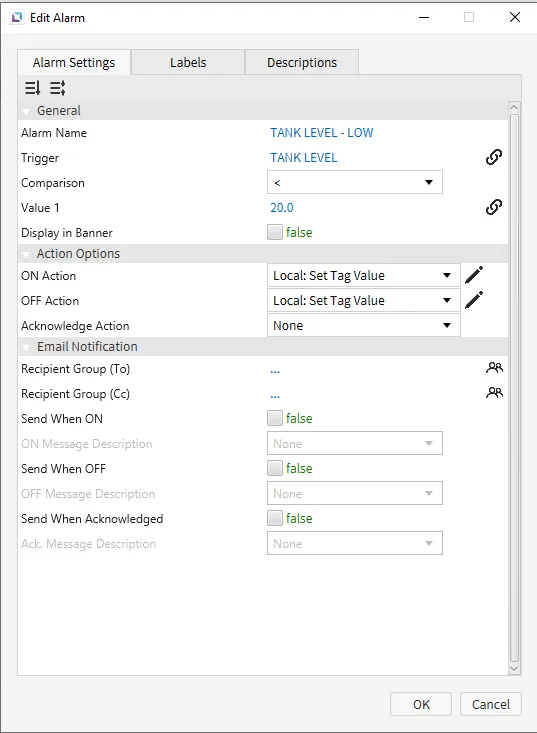
- TANK LEVEL - LOW
- Comparison: Less than (<)
- Value 1: 20
- TANK LEVEL - LOW LOW
- Comparison: Less than (<)
- Value 1: 10
- TANK LEVEL - HIGH HIGH
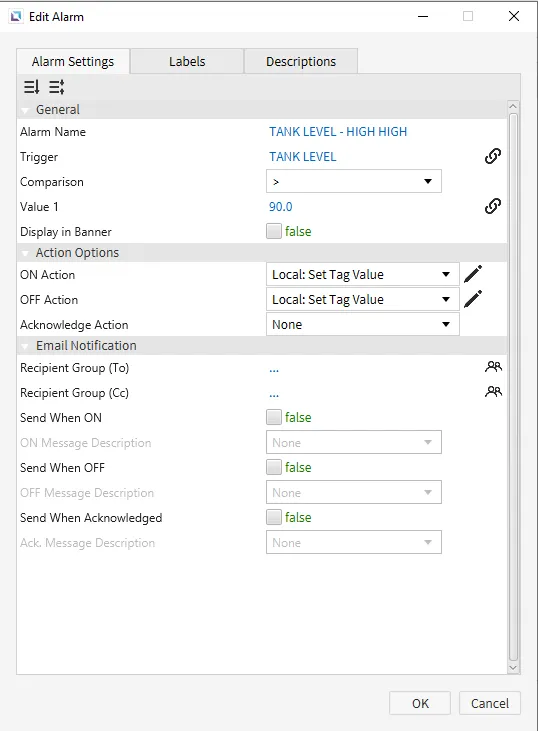

-
Actions will be assigned to the ON Action and OFF Action fields of each alarm created in the previous step. Click on the dropdown menu for the ON Action field of the TANK LEVEL - HIGH HIGH Edit Alarm window.
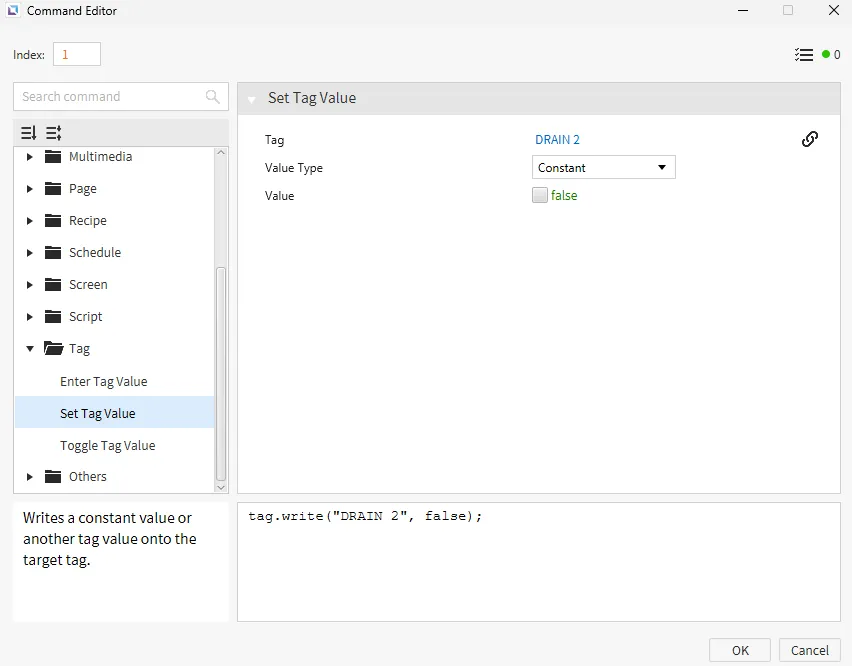
Select Add New Command. Use the Set Tag Value command, assigning it to the DRAIN 2 tag. Set the value to true.
Repeat this step for the OFF Action field, but set the value to false.
Repeat the above steps for the following alarms by applying their respective tags:
- Alarm: TANK - HIGH ↔ Tag: DRAIN 1
- Alarm: TANK - LOW ↔ Tag: PUMP 1
- Alarm: TANK - LOW LOW ↔ Tag: PUMP 2

-
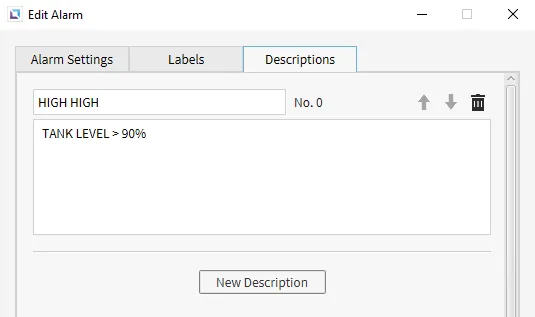
Within the TANK LEVEL - HIGH HIGH Edit Alarm window, navigate to the Descriptions tab and click New Description. Type HIGH HIGH in the title field and TANK LEVEL > 90% in the body field and press OK.
Set the following expressions for each of the alarms:
- TANK LEVEL - HIGH: TANK LEVEL > 80%
- TANK LEVEL - LOW: TANK LEVEL < 20%
- TANK LEVEL - LOW LOW: TANK LEVEL < 10%
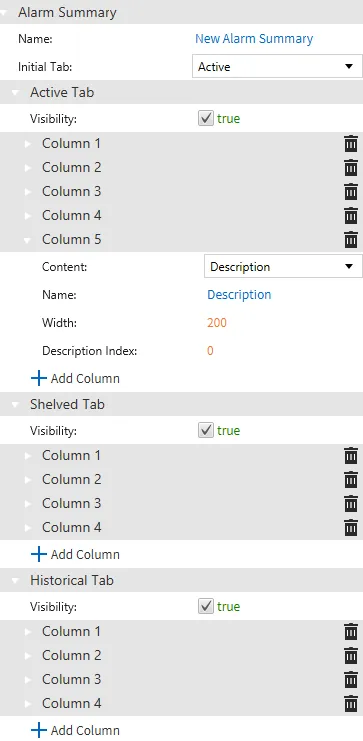
Alarm Summary Configuration
- Click Insert > Alarm Summary, then click and drag on the page to add the Alarm Summary object.
-
Change the parameters within the Basic Properties (Alarm Summary) pane to configure the Alarm Summary object. Add Column 5 to the Active Tab by scrolling down to just below Column 4 and pressing the + Add Column icon. Column 5 will automatically default to Description.
Change the width field to 200 by double-clicking 100 and typing 200.
Project Deployment
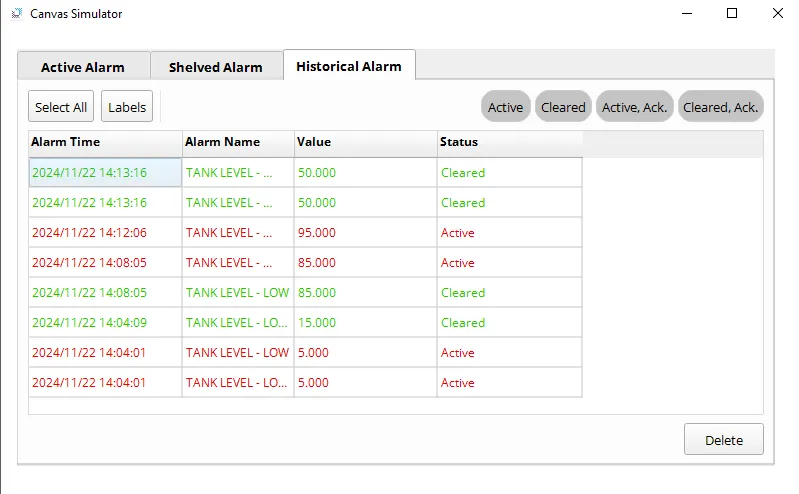
- Click Tools > Launch Simulator to launch the Canvas Simulator.
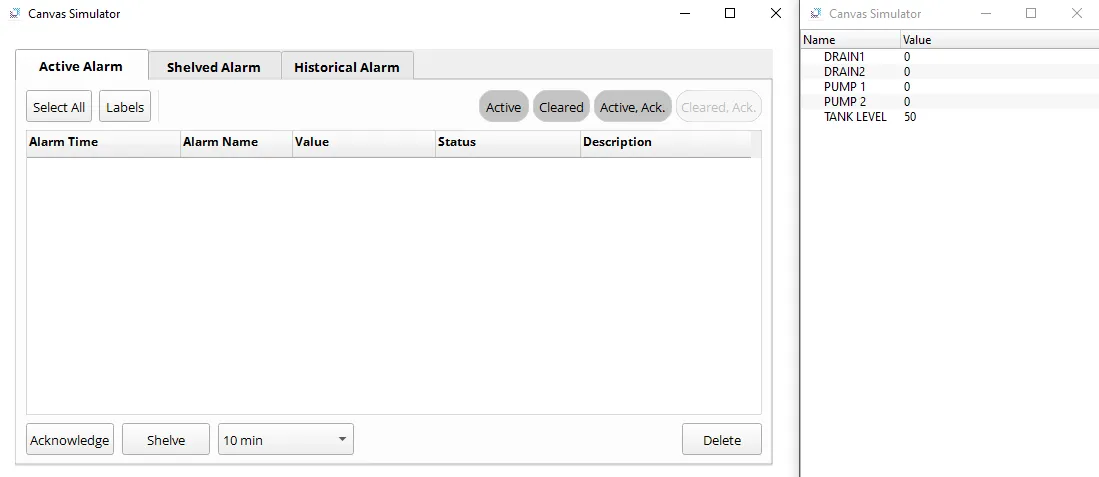
-
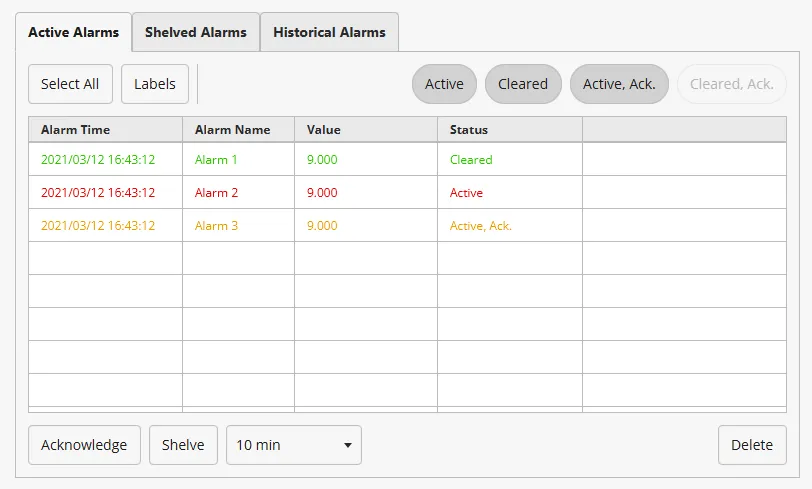
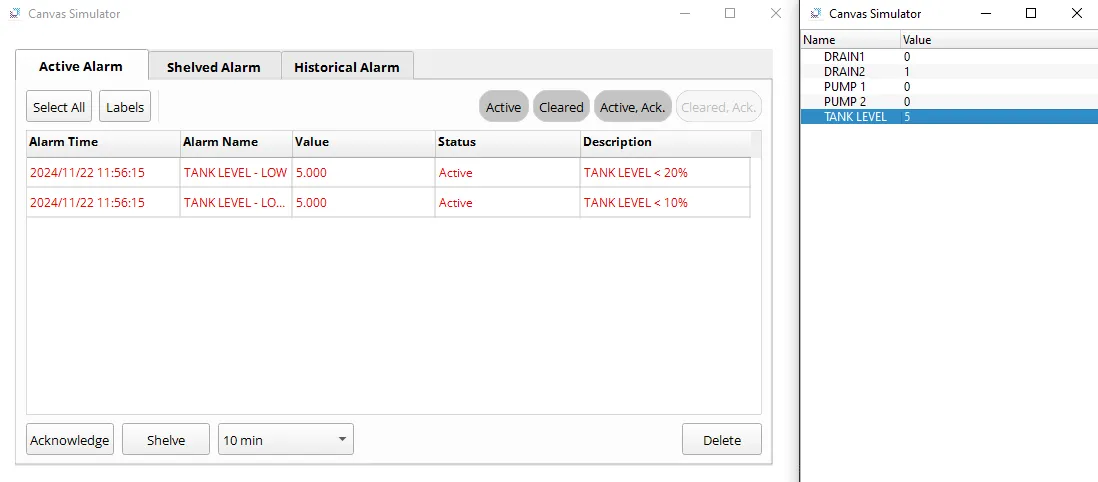
Double-click the 50 next to the TANK LEVEL tag and place the number 5 there. Two alarms should occur since both alarms, TANK LEVEL - LOW and TANK LEVEL - LOW LOW, are satisfied, and you can check the contents of those alarms.
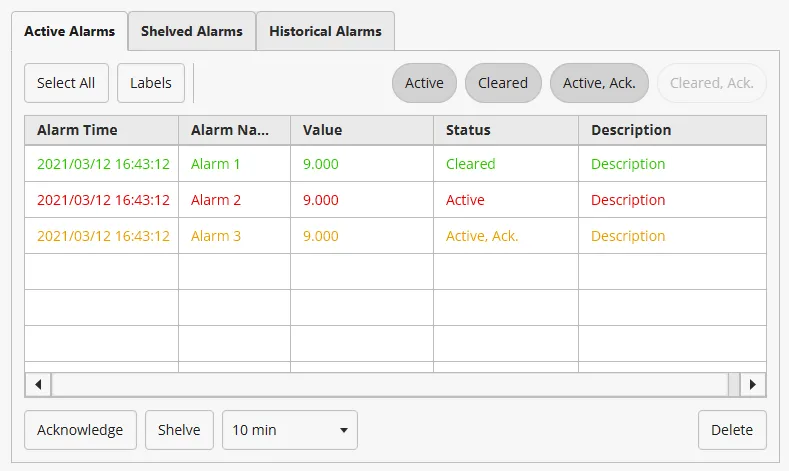
Red text means the alarm is active.
Additionally, tags PUMP 1 and PUMP 2 are set to 1 (true) because of the simultaneous ON Actions from the two alarms.
-
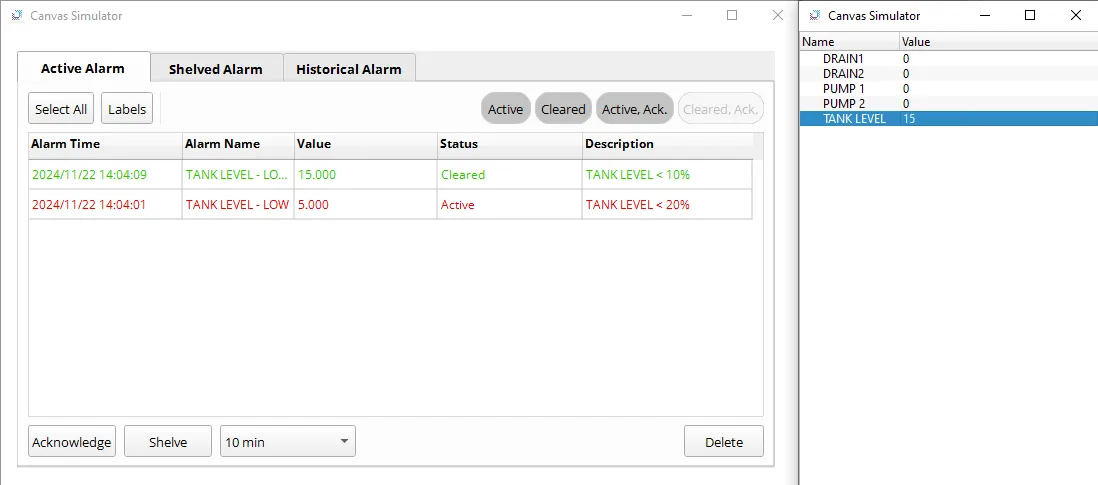
Setting the TANK LEVEL to 15 will resolve the TANK LEVEL - LOW LOW alarm and reset tag PUMP 2 to 0 (false).
Green text means the active alarm was resolved.
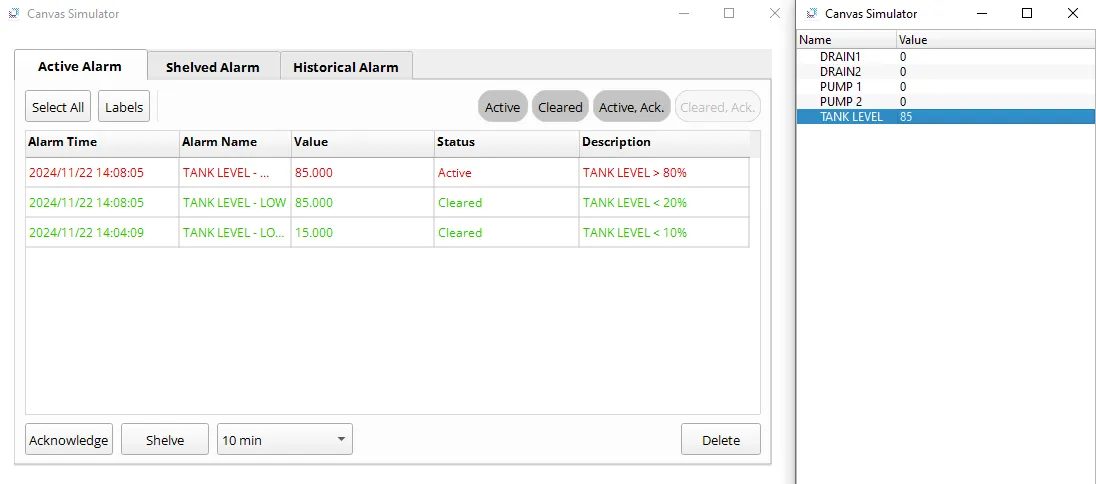
- Setting the TANK LEVEL to 85 will resolve the TANK LEVEL - LOW alarm but triggers the TANK LEVEL - HIGH alarm, resetting tag PUMP 1 to 0 (false) and setting tag DRAIN 1 to 1 (true).
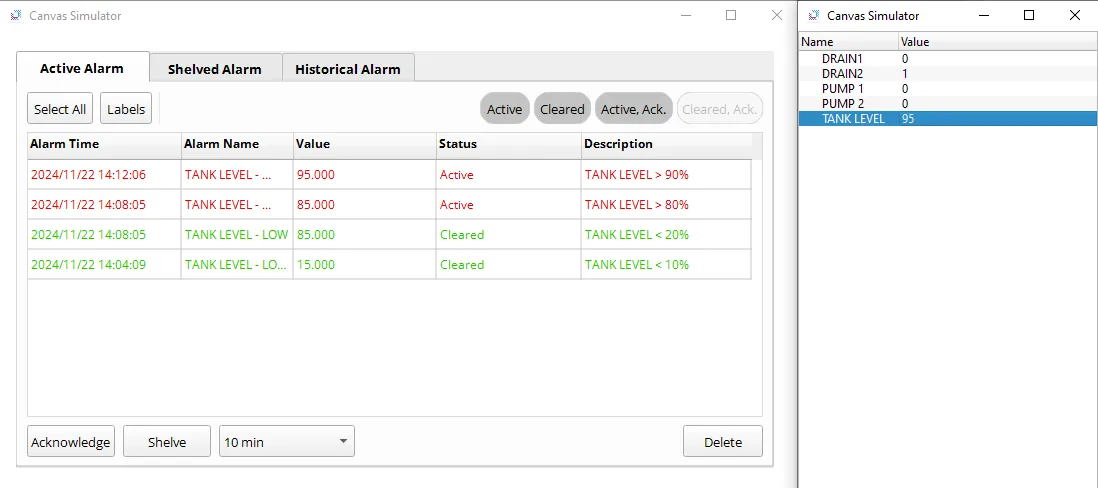
- Setting the TANK LEVEL to 95 will trigger the TANK LEVEL - HIGH HIGH alarm, setting the tag DRAIN 2 to 1 (true).
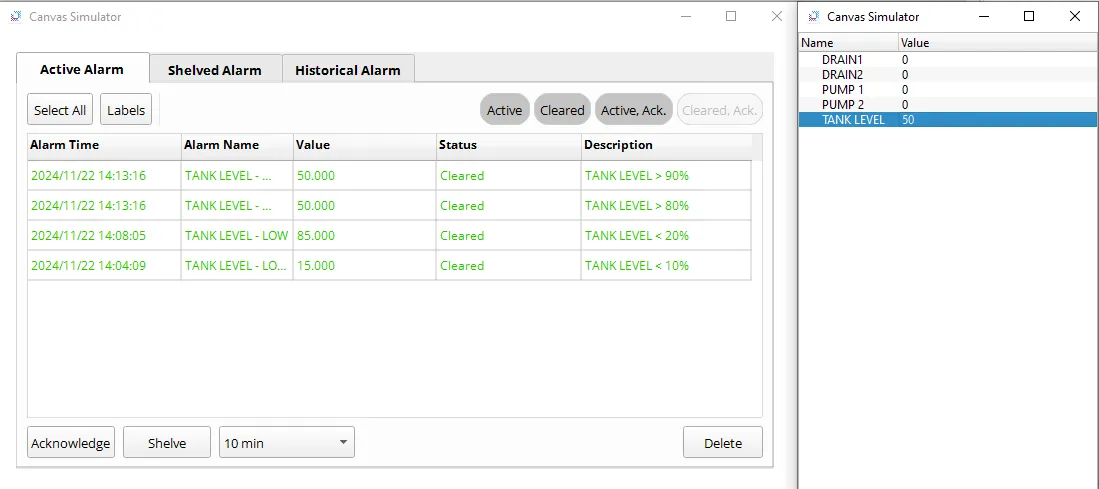
- Setting the TANK LEVEL to 50 will resolve all alarms, resetting tags DRAIN 1 and DRAIN 2 to 0 (false).
- Navigate to the Historical Alarm tab to view the archived alarm events.