SQL Audit Logging
Audit Logging with SQL
The following guide is an example of using the Canvas audit logging feature with SQL.
Basic Usage/Config - General
-
Create a new project.
-
Open the Project Properties and enable the Audit Log feature.
-
Create an audit log table object on the page.
-
Run the project.
-
In the audit log table, press the Search button to generate entries. Entries will not be displayed until the Search button is pressed.
For a full list of logged actions, please refer to the logged actions appendix page.
Basic Usage/Config - External SQL Server
The default database type for SQLite uses a local file on the Xpanel. When this option is selected, the data cannot be accessed using SQL. Instead, you can view the data in the audit log table, or you can export it to a CSV file using the Export button in the audit log table.
If you choose any other database type, the data will instead be stored using an external SQL database. This external SQL database must be set up and configured outside of Canvas, and you will need a valid connection between the Xpanel and the SQL server.
Make sure that your firewall settings do not prevent access from external devices on the specified SQL port. Each SQL implementation has a different default port.
You will need to manually create a database with a specified name on the SQL server. In this example, we use the name audit_event_database. For any SQL server, you can create this database by running the SQL command CREATE DATABASE audit_event_database; from a SQL client.
A table named audit_event will automatically be generated in the specified database once you run the project.
External SQL audit logging does not work in the online simulator. All audit events in the simulator will be stored in RAM, even if the SQL configuration is invalid, so do not use the simulator to test the SQL connection.
Database Types
The following database examples are shown below:
MySQL
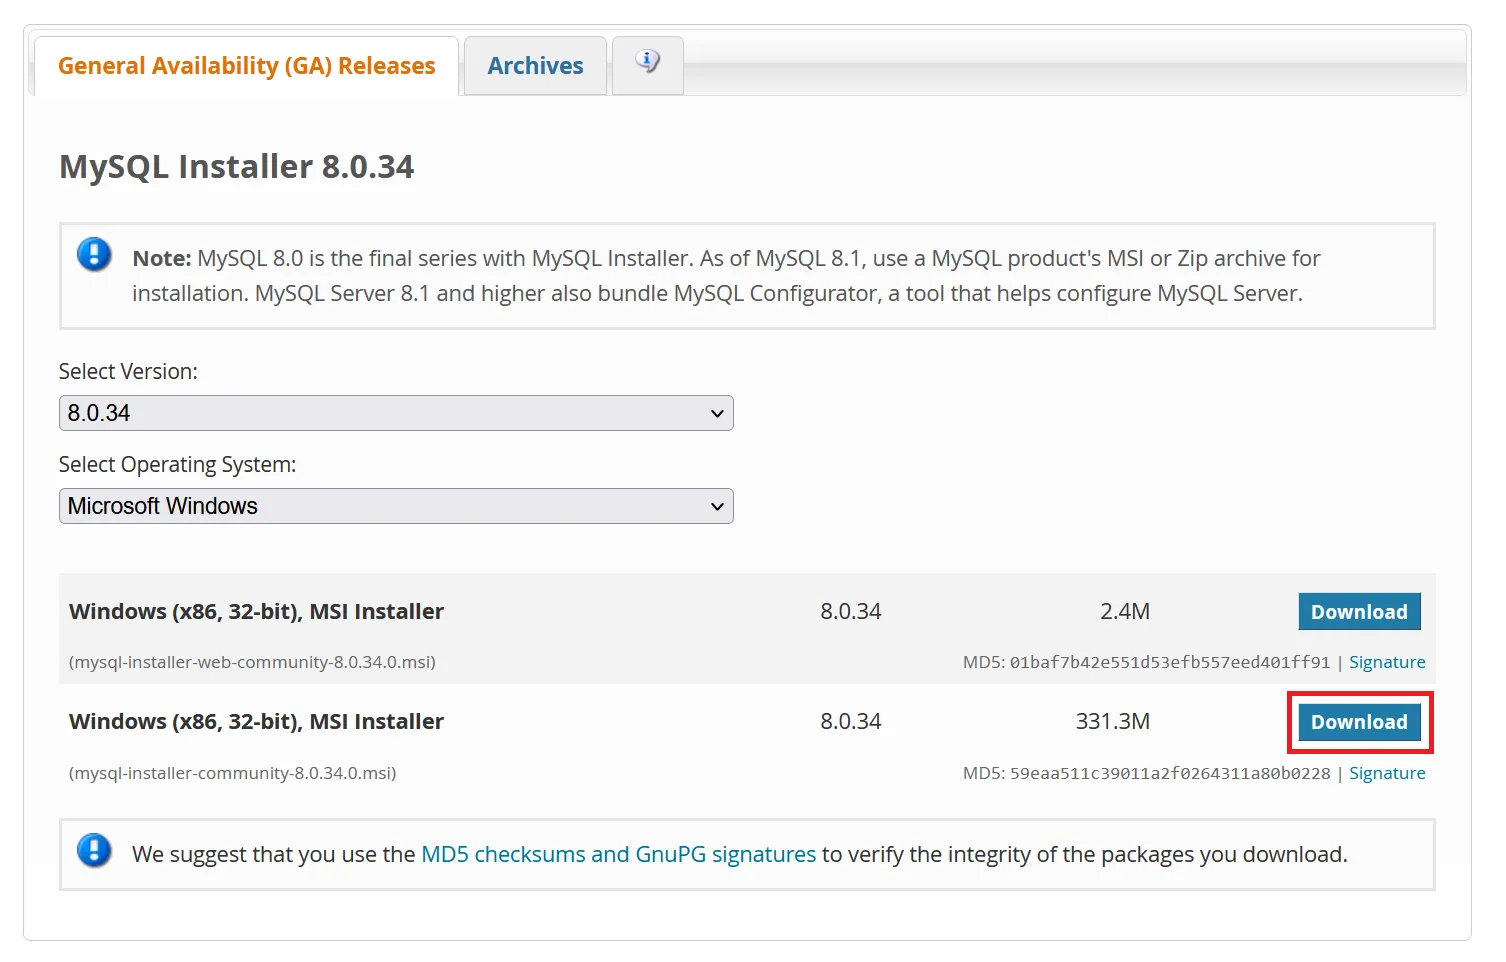
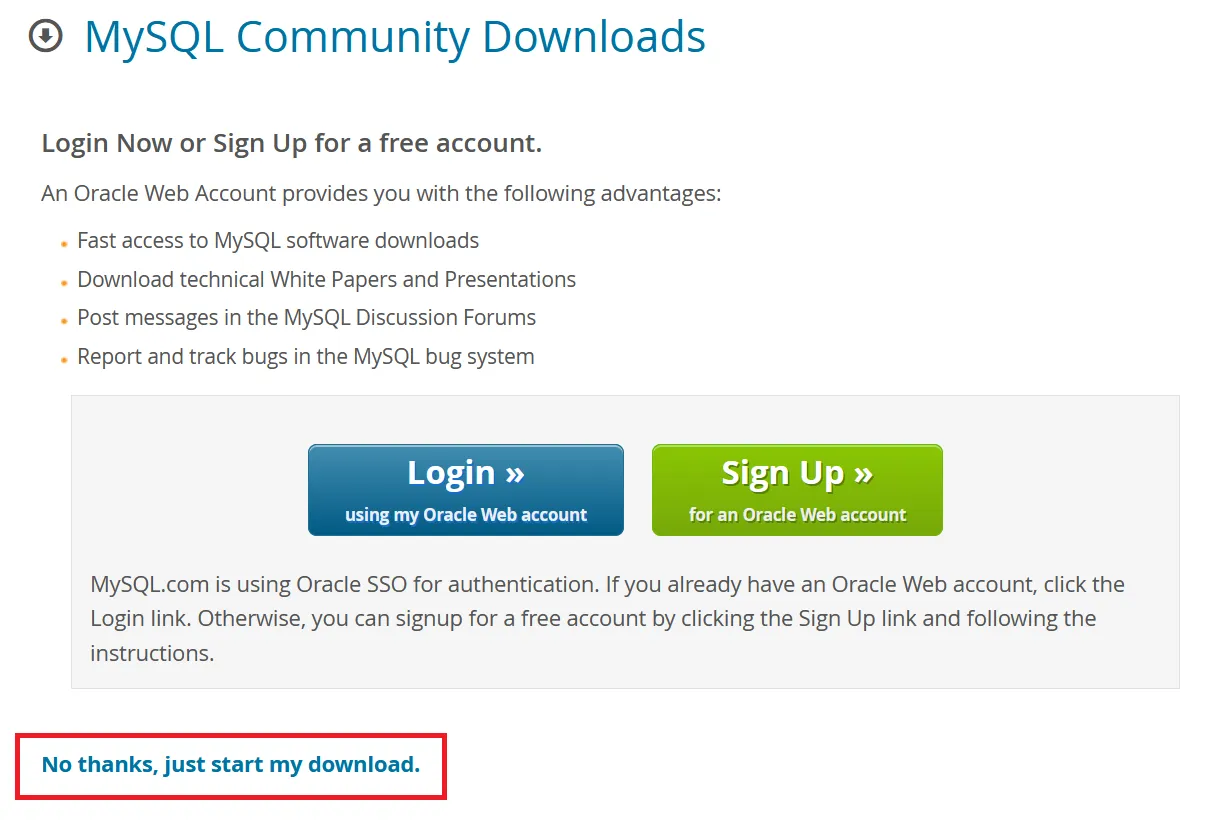
- Download MySQL installer from MySQL :: Download MySQL Installer
-
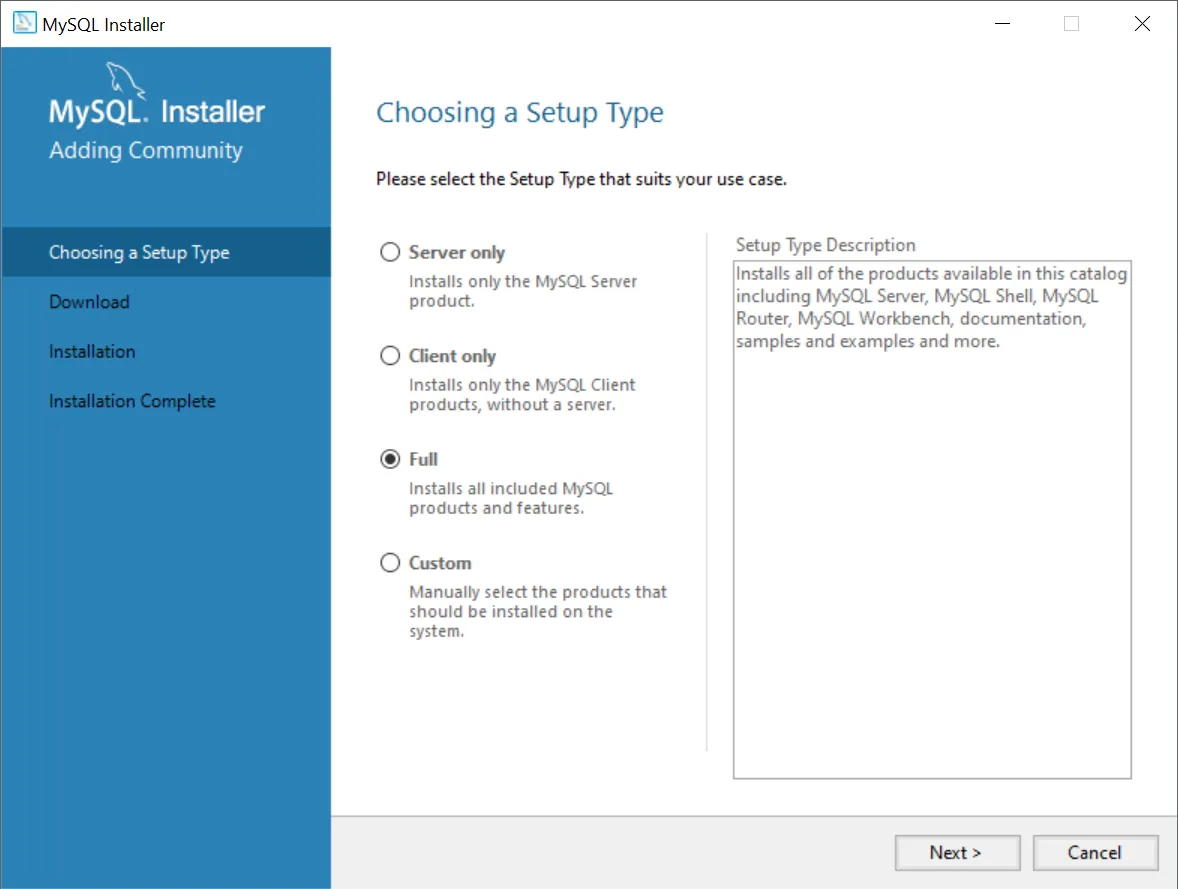
Run the installer.
-
Choose the Full setup type.
You only need the server, but MySQL Workbench is a nice client to view your databases from.
-
Continue with the remaining steps, applying the highlighted non-default options.
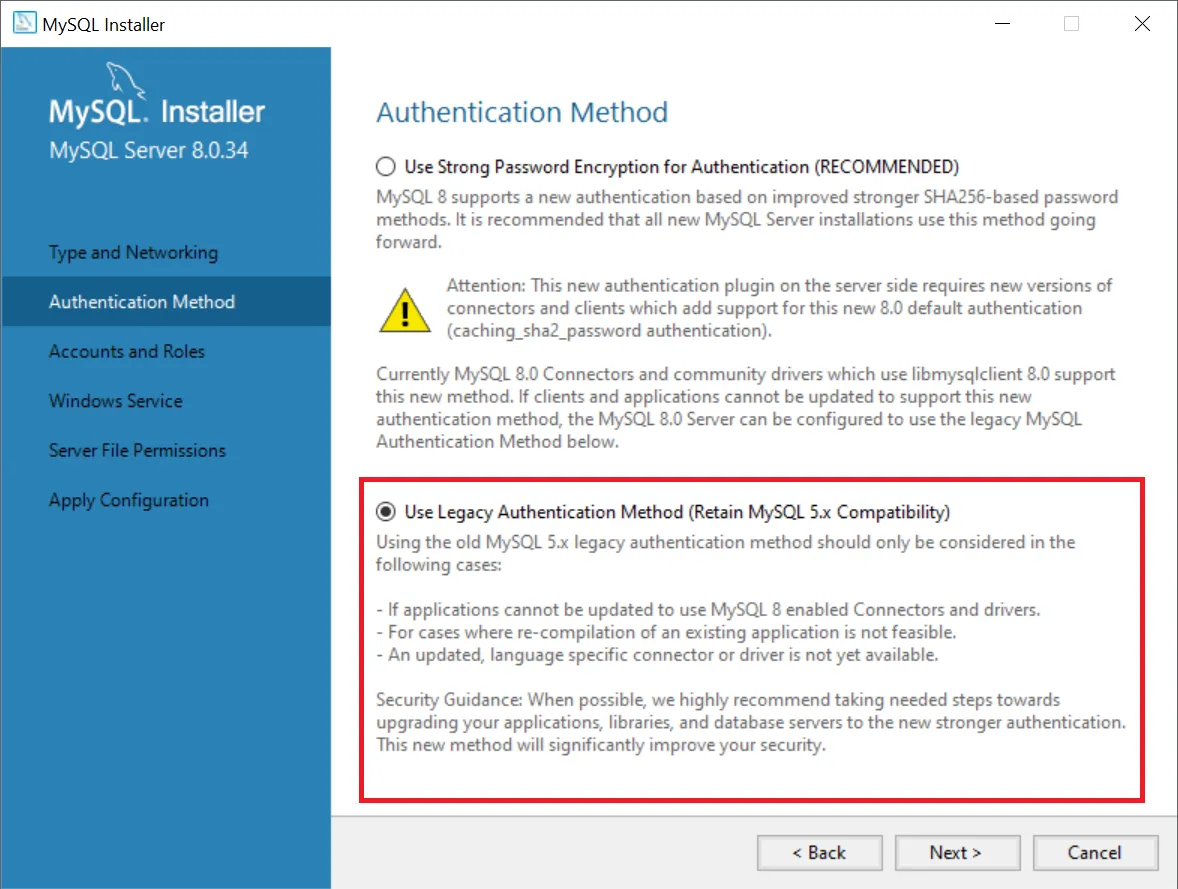
Be sure to select the legacy authentication method. If you don’t, you will need to later modify either the server or individual users so that they use it.
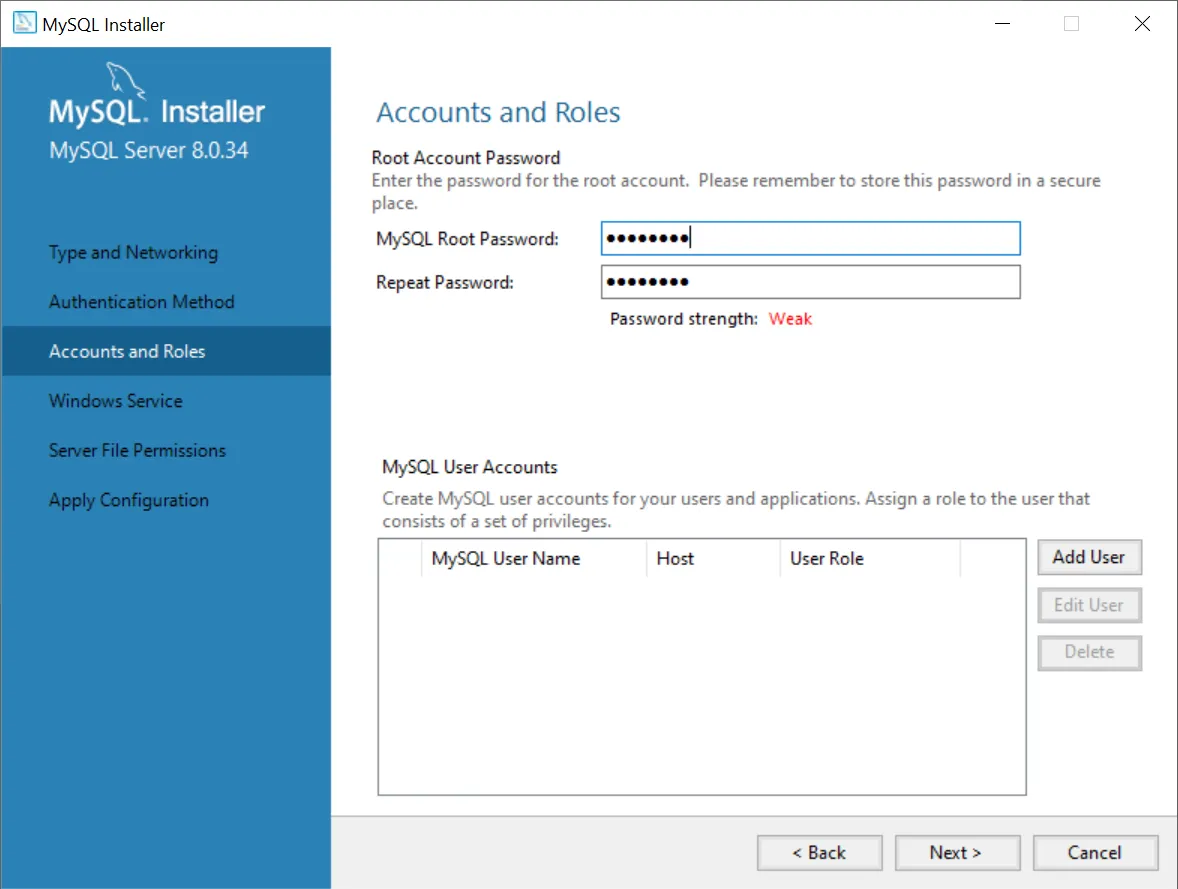
Assign and remember the root password.
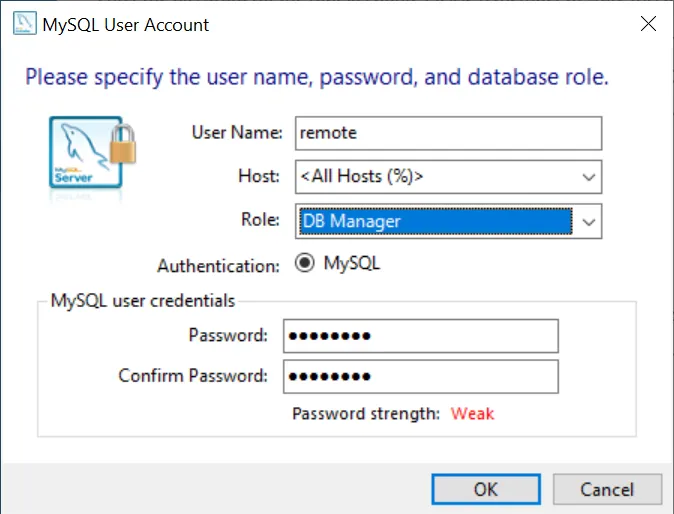
Create a new user (remote is used for this example) and assign and record a password. It is recommended to choose DB Manager so that the user has restricted privileges. This can be edited later.
Note: By default, the root account can only connect from localhost, so it is strongly recommended that you use a separate account.
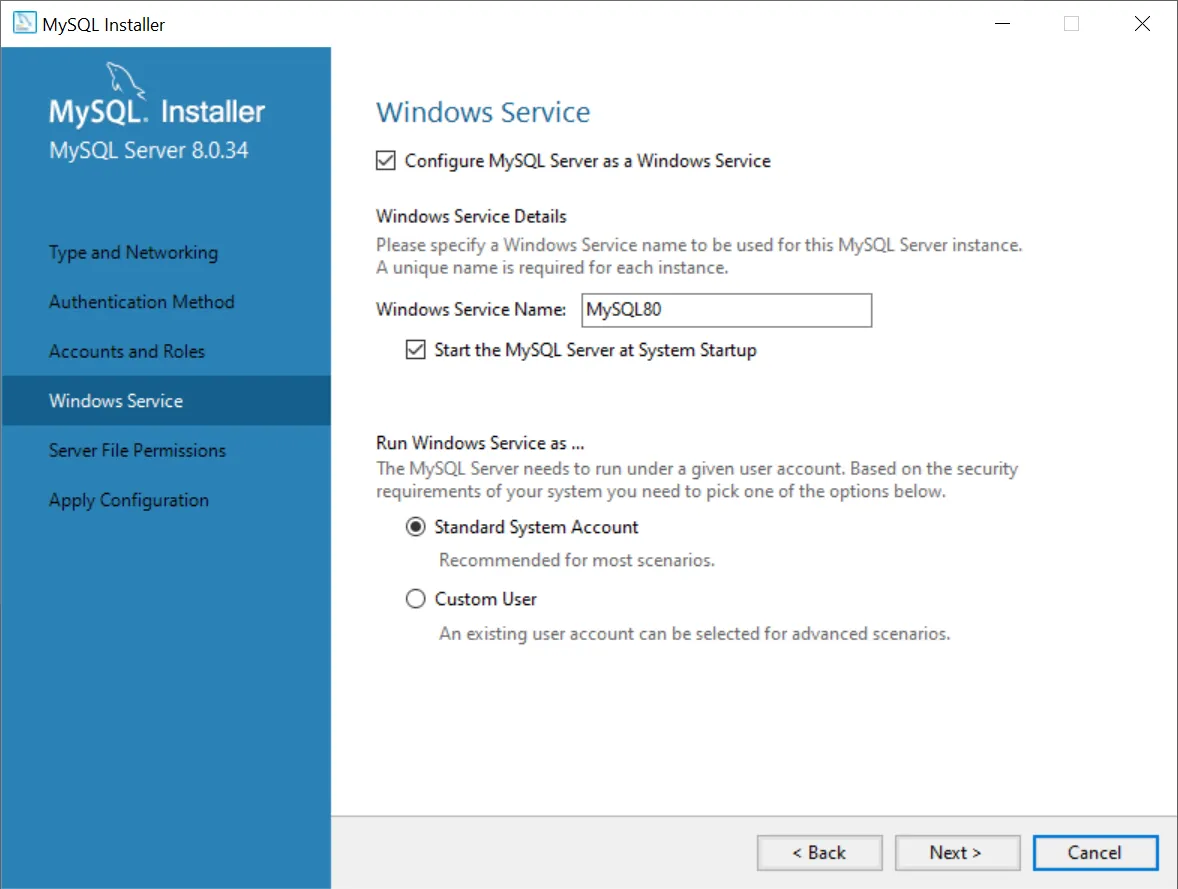
Install the server as a service so that you do not need to start/stop it manually:
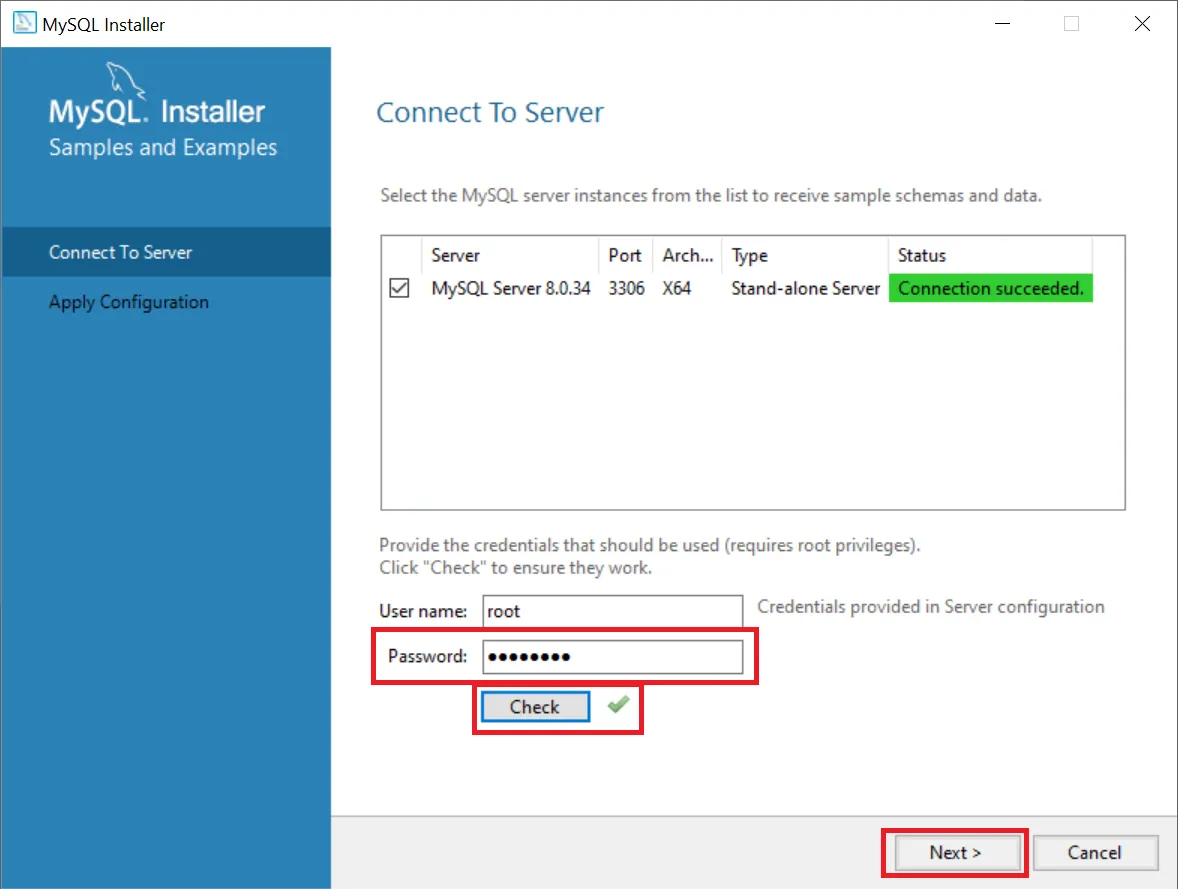
When you are asked to connect to the server, enter the root password, then press Check, then press Next:
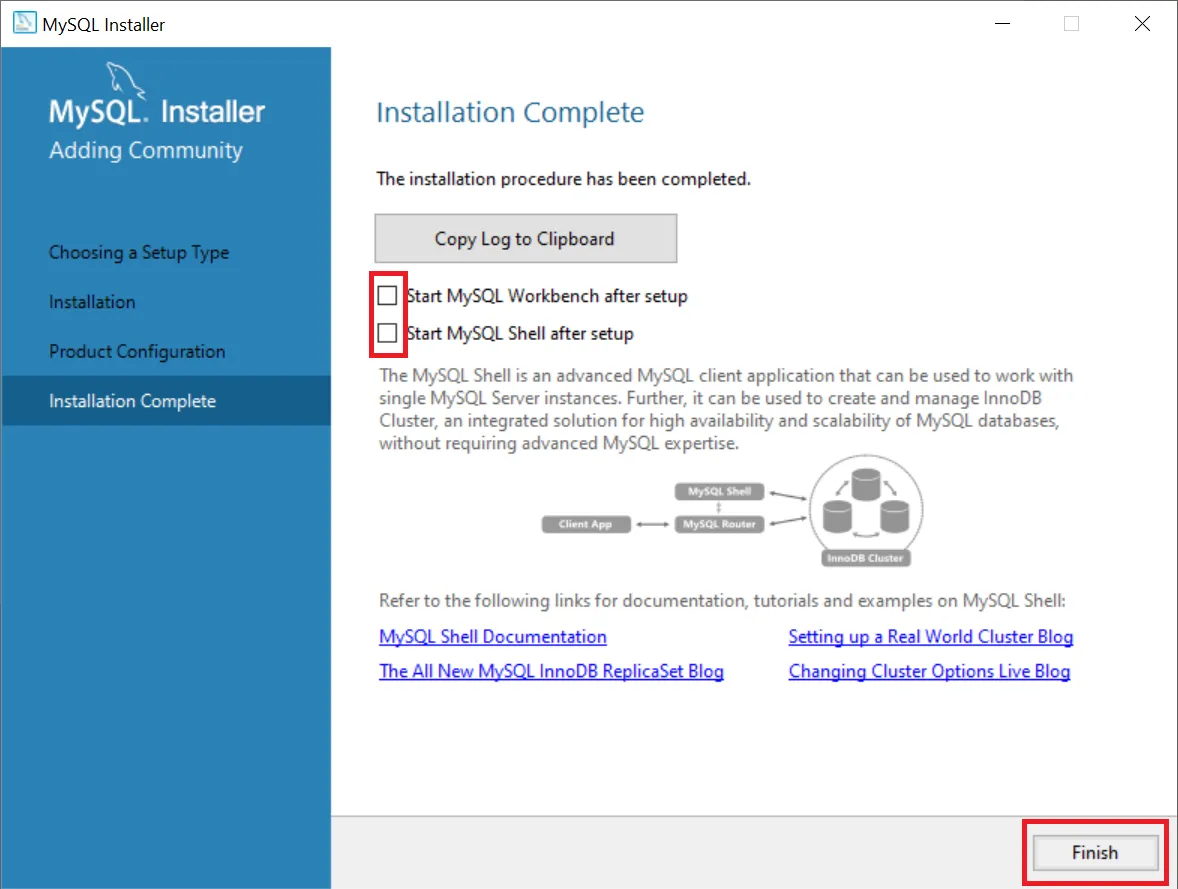
There is no need to run the workbench or shell after completion:
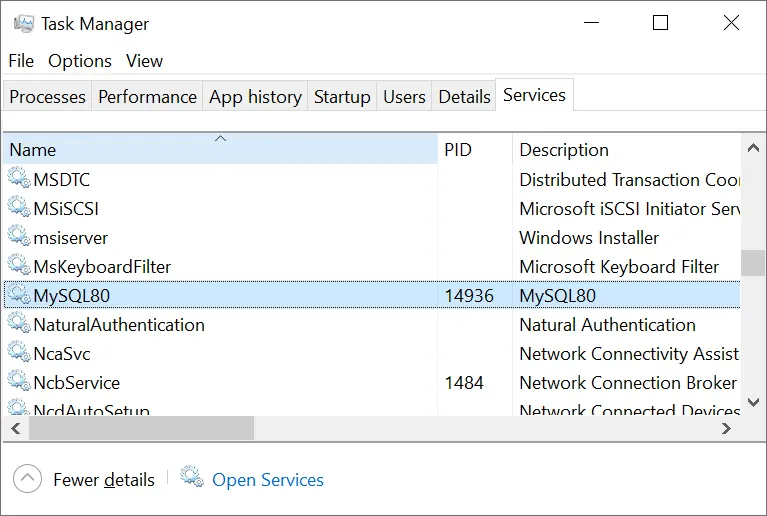
- We chose to install MySQL Server as a service, so it should be running in the background now. You can check or change its running status from the Windows Services tab (Ctrl + Alt + Delete -> Task Manager):
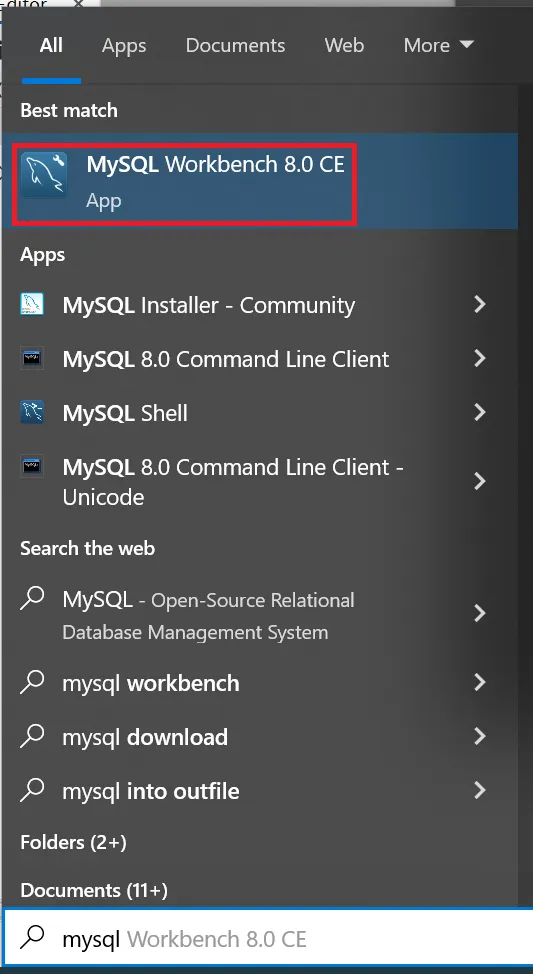
- Open MySQL Workbench from the Start Menu.
- Connect to the local server instance by clicking on it.
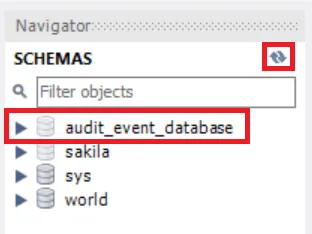
- In the navigator pane, go to the Schemas tab. This will show all databases and tables on the server.
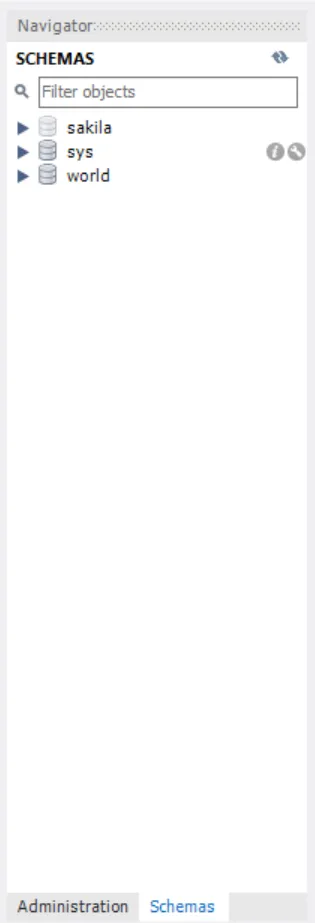
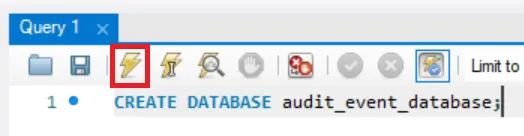
- Choose a name for your database. For this example, we will use audit_event_database. Run the command
CREATE DATABASE audit_event_database;. To do this, enter the command in the Query 1 text area, then press the lightning button to execute it.
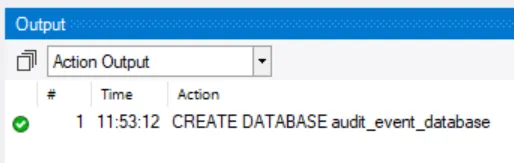
- If the query was successful, you should see a success message in the output area below.
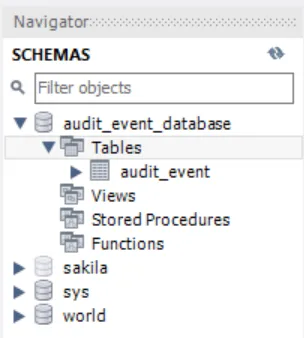
If you refresh the Schemas tab, you will see the new database.
- In your Canvas project, open the Project Properties and edit the Audit Log options as shown:
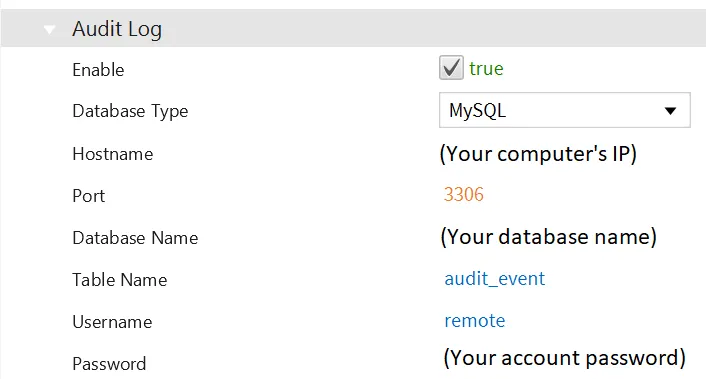
- In Canvas, save your changes and run the project. A table named audit_event_table will be automatically generated within the audit_event_database database once you perform an action.
New password format
If you are using a server with the new password encryption method, it is still possible to connect. You can modify a user to use the legacy password encryption by running the following command in MySQL Workbench:
ALTER USER 'username'@'%' IDENTIFIED WITH mysql_native_password BY 'password';
Replace username and password with your remote account credentials.
You may need to run the command FLUSH PRIVILEGES; to apply the change.
You can also change the default password encryption method for an existing server by editing its config file. By default, this is located at C:\ProgramData\MySQL\MySQL Server 8.0\my.ini.
Add or edit the following line (You may already have this at line 109):
authentication_policy=mysql_native_password,,
Then restart the server. Any existing users may still need to be altered.
MariaDB
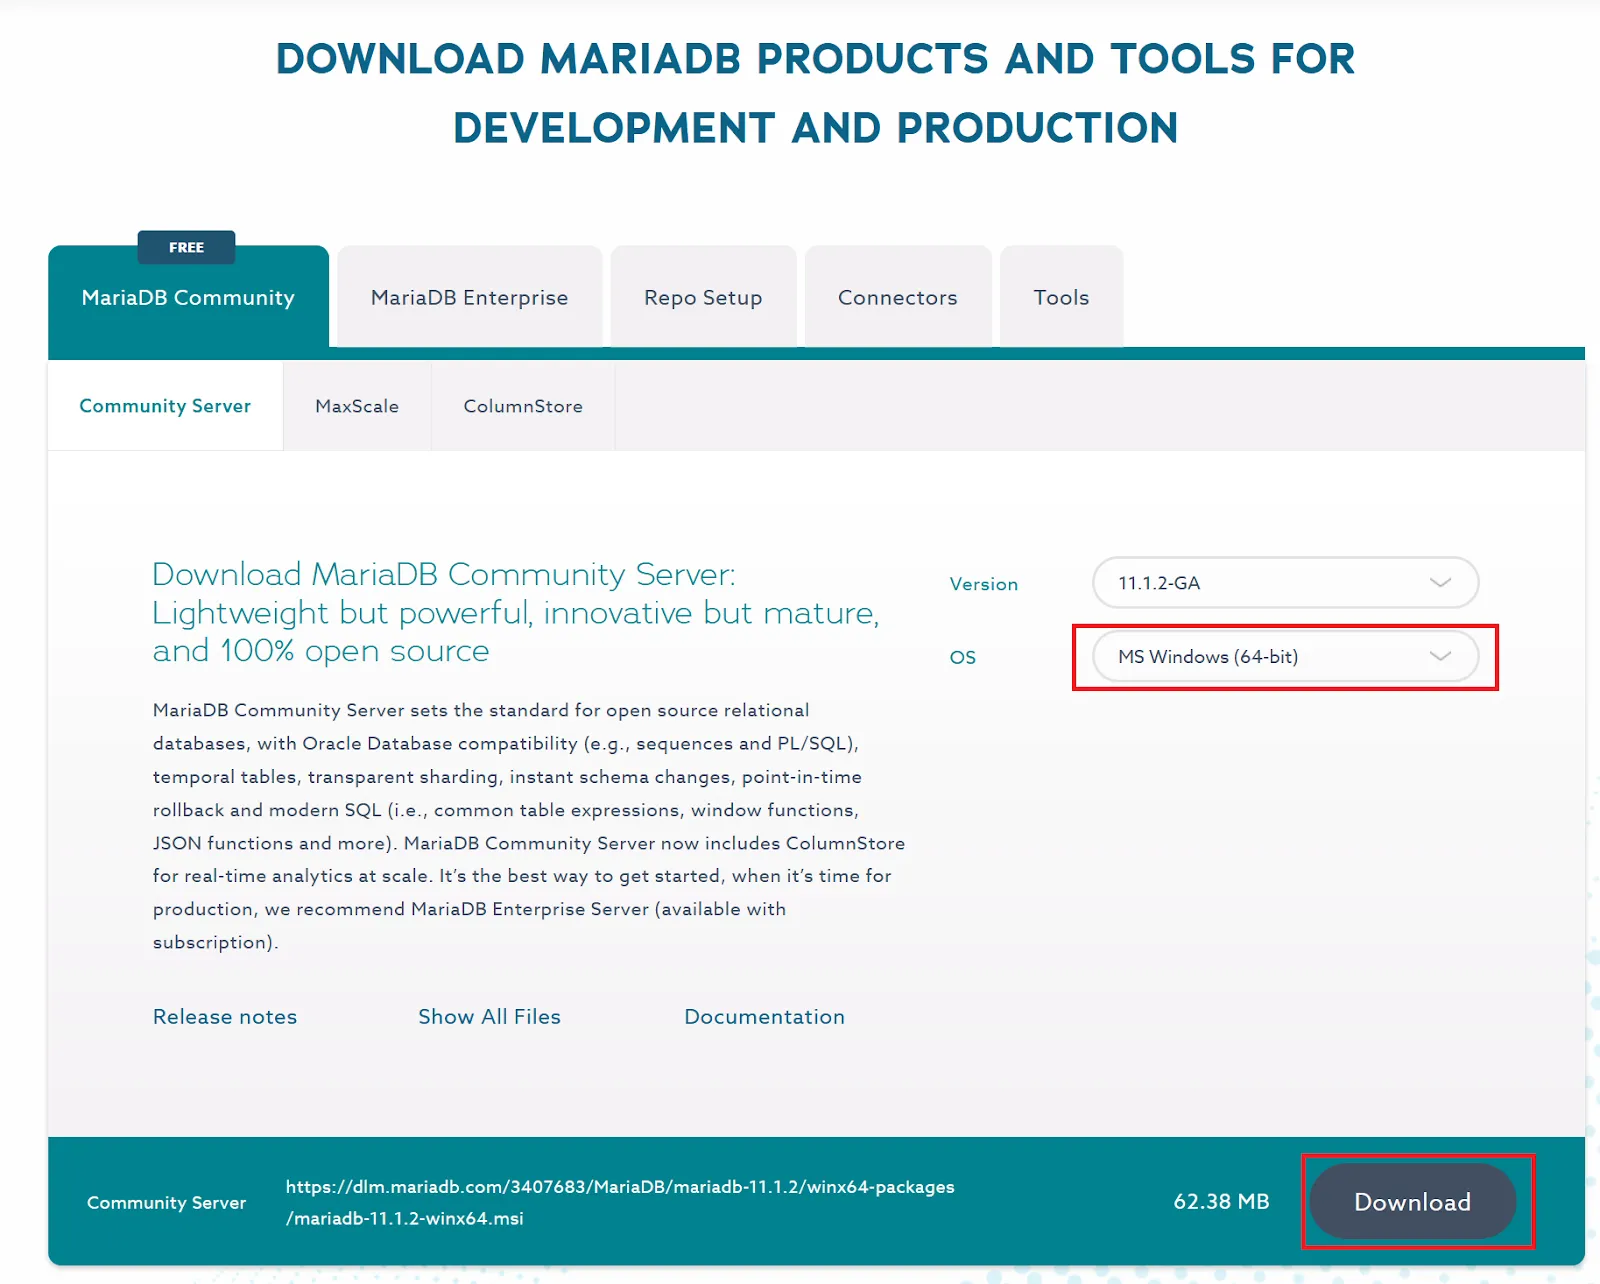
- Download the MariaDB server installer from MariaDB Products & Tools Download | MariaDB, making sure to choose the correct operating system.
-
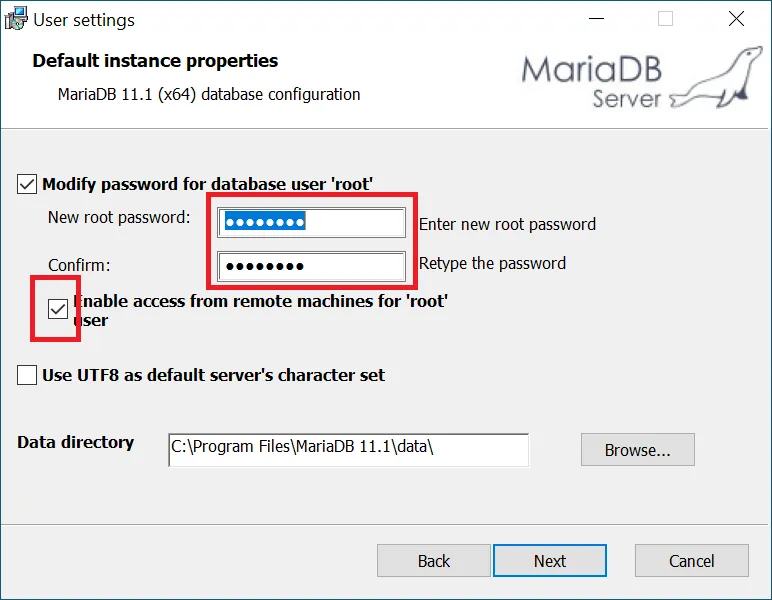
Run the installer. Follow each step and apply the non-defaults shown below.
Choose a new password and enable access from remote machines for the 'root' user.
Note: in a production environment, it is better to create a separate account with limited privileges for remote access. However, the root account can be used for testing and development.
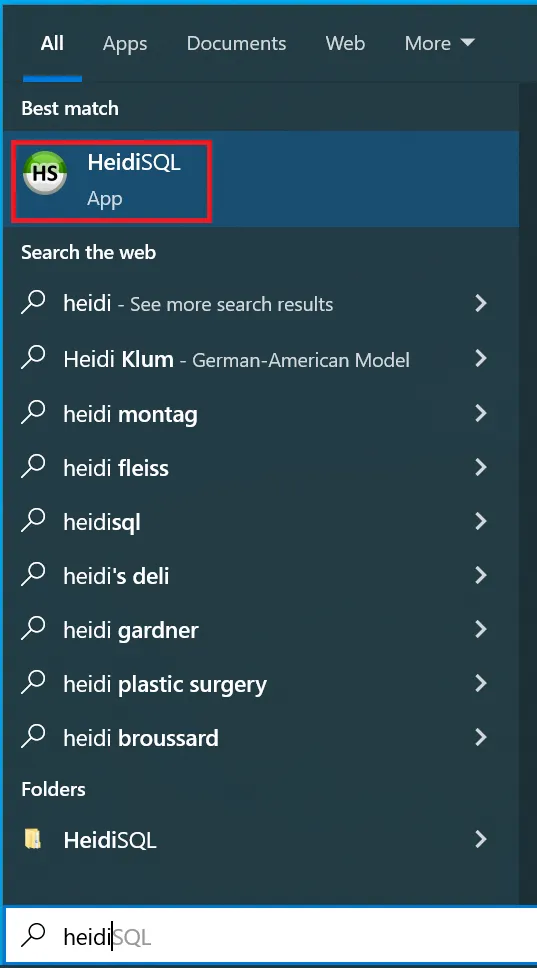
- After installation is finished, you can connect to the server using the HeidiSQL client.
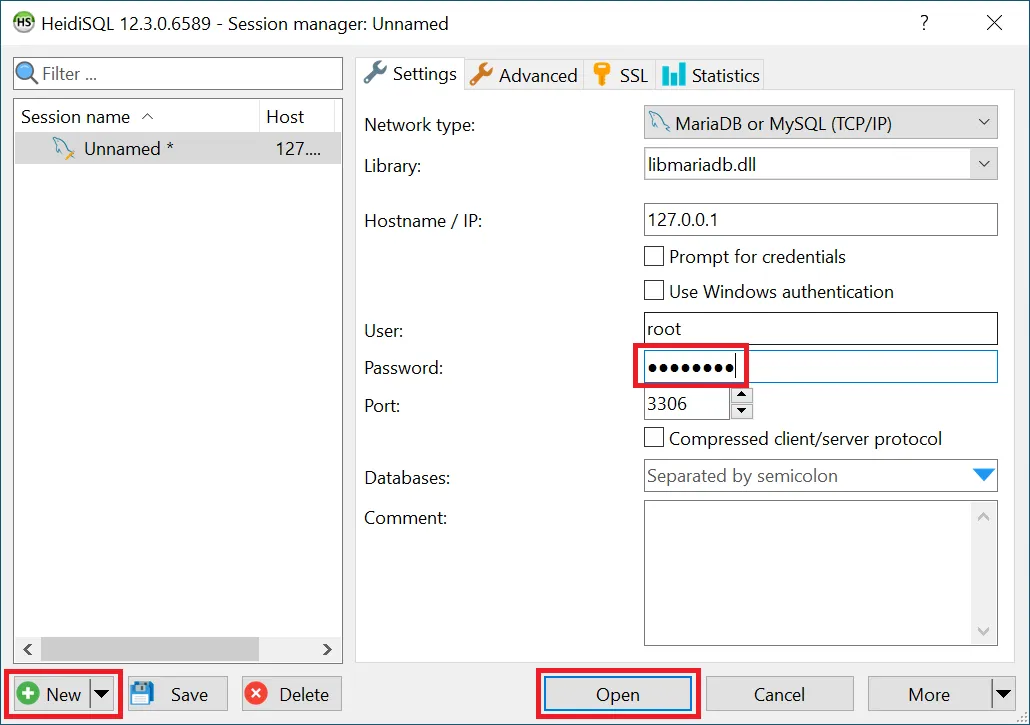
- Press New to create a new connection. Enter your root password from above, then press Open.
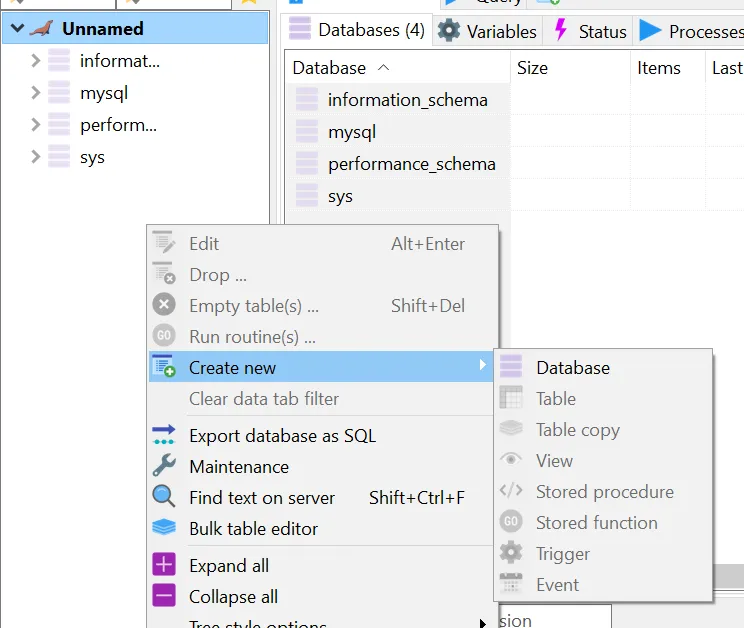
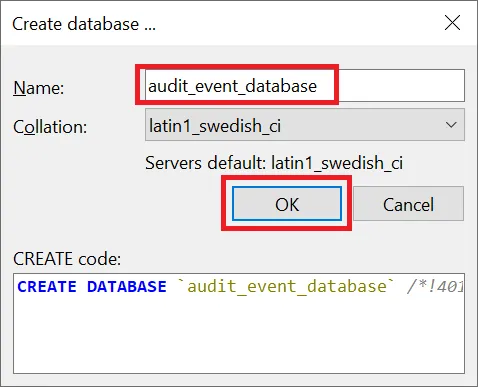
- In the tree view on the left, right-click the open space, then choose Create new > Database.
- Enter a name for the database, then press OK.
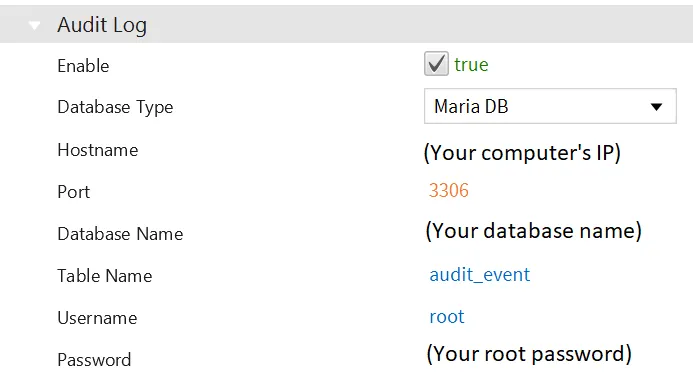
- In Canvas, open the Project Properties window, then go to Runtime Options > Audit Log. Use these credentials and the database name you created while installing MariaDB. The settings should look like this:
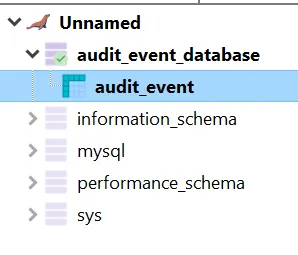
- Save and run the project. Once an event has been generated, you can see the audit_event table inside of your database.
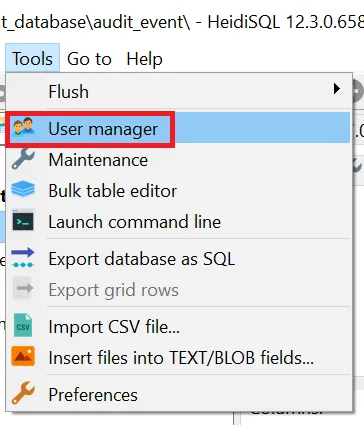
Editing users
If you do not wish to use the root user, HeidiSQL provides a GUI for editing users. Go to Tools > User Manager:
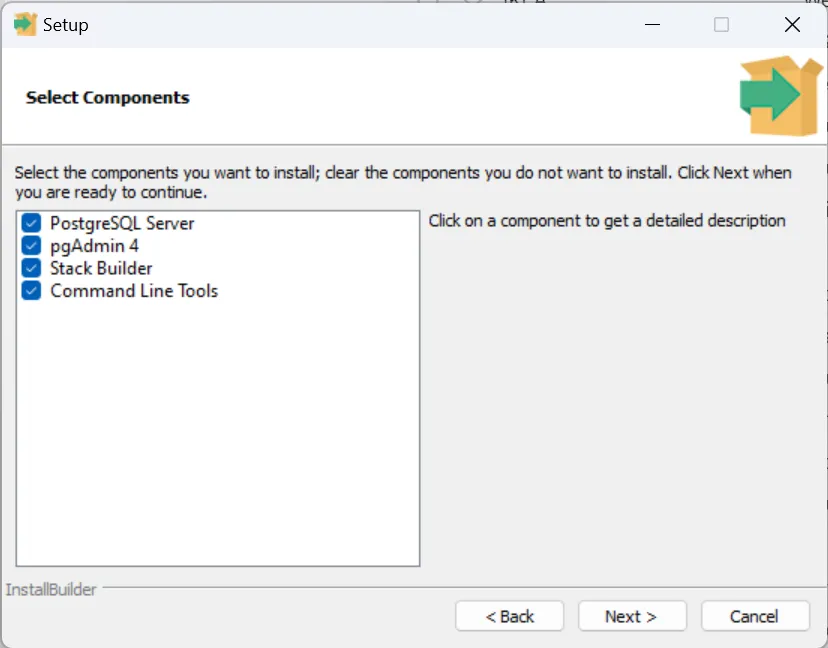
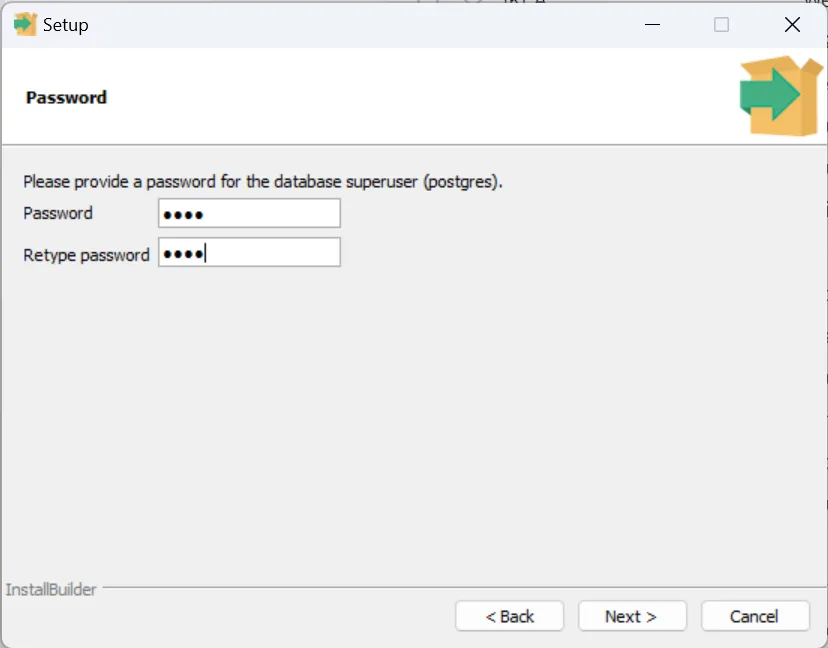
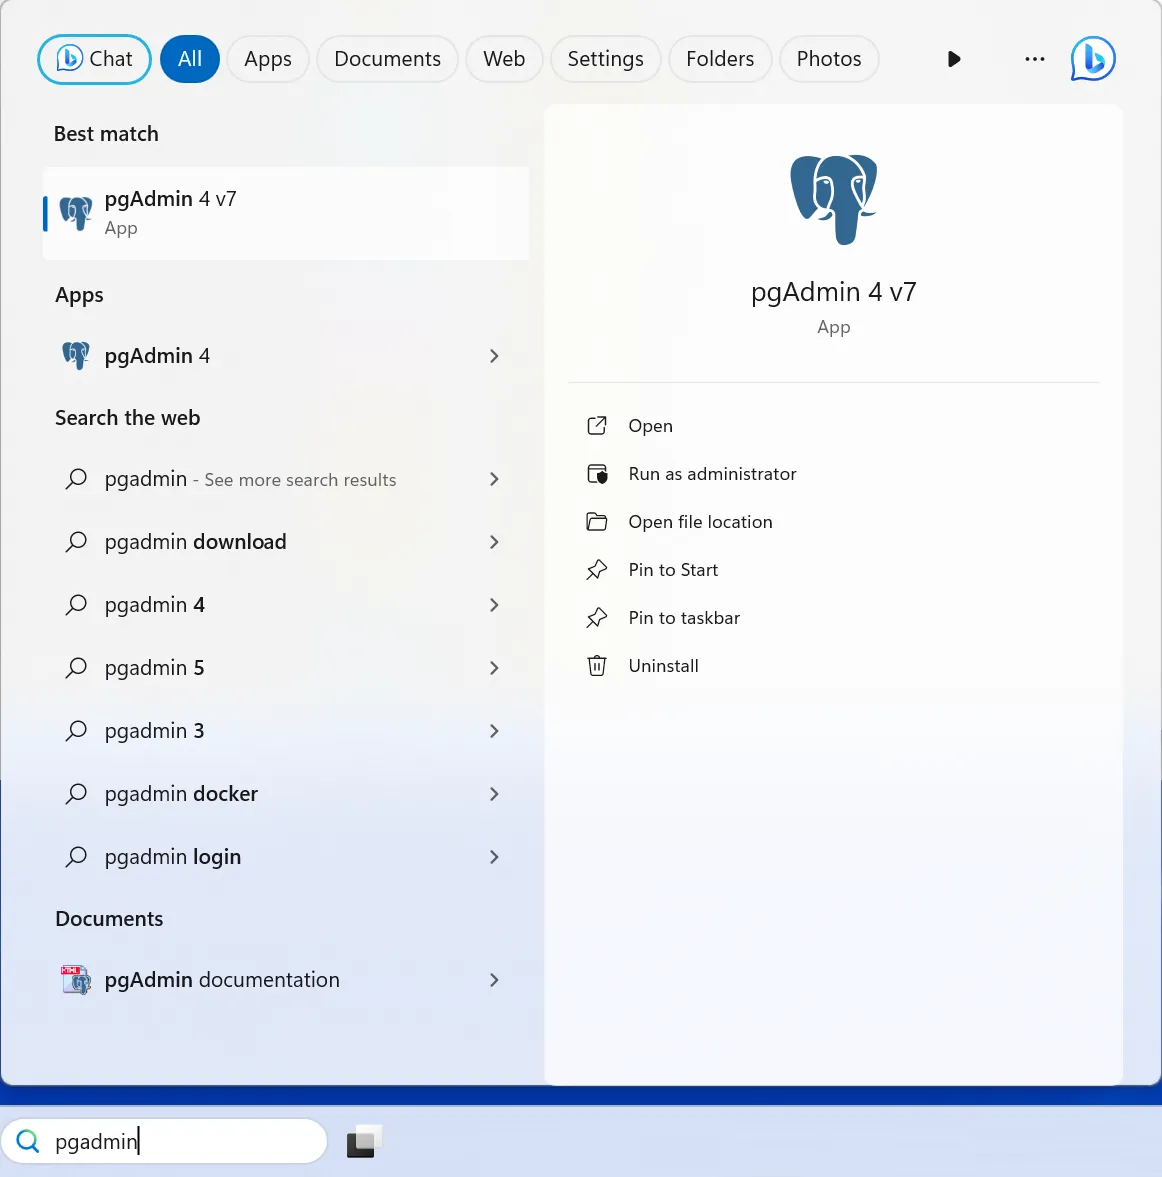
PostgreSQL
-
Installation:
Go to Community DL Page and select the download link for your operating system.
Run the downloaded “.exe” file. (postgresql-
version-OS version.exe)
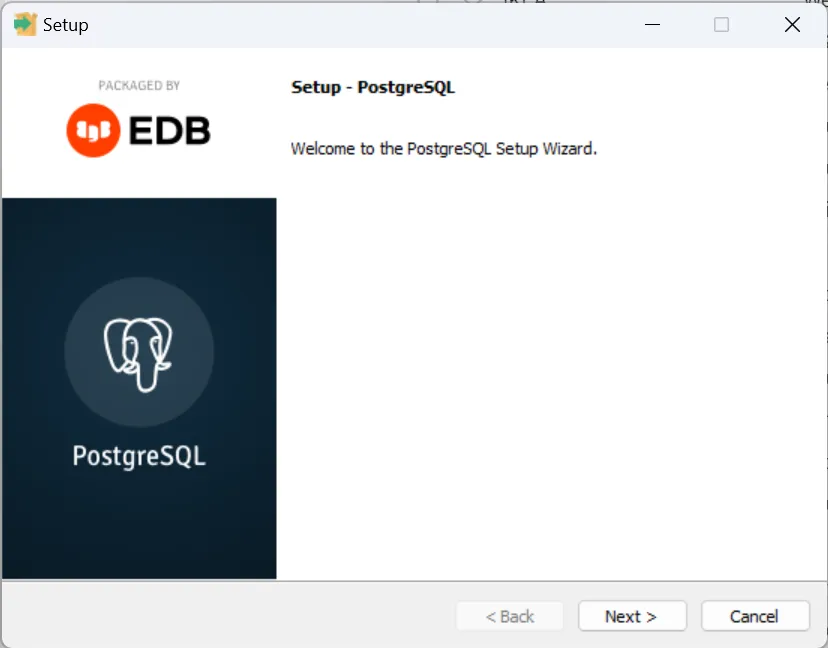
Continue the download process.
Install pgAdmin, which is bundled with the installer.
Set an administrator password and port number during the installation.

Proceed until the end of the installation.
-
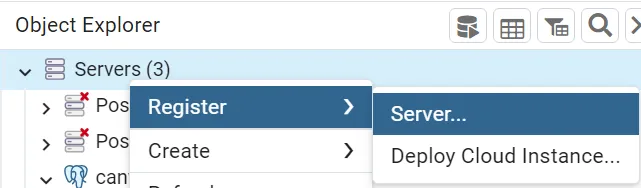
Registering a server/database:
Launch PgAdmin.
Right-click on Servers and select Register > Server.
Enter the name of the server.
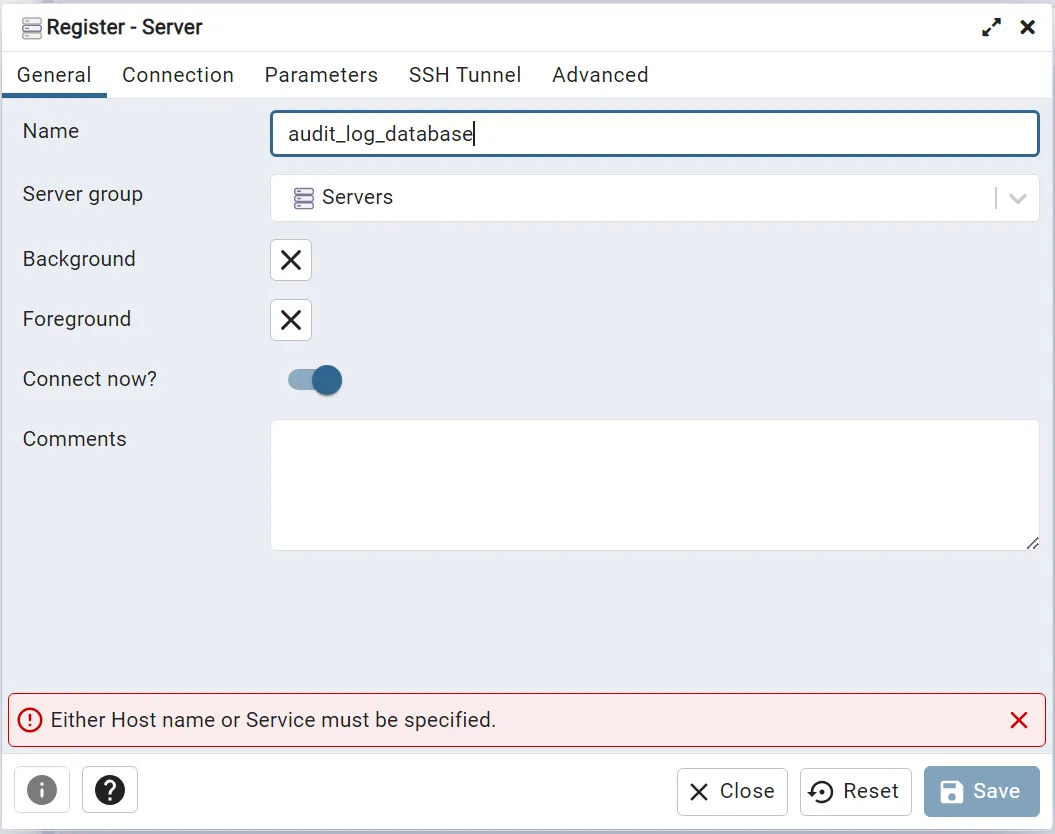
Go to the Connection tab and enter the Host name/address and other connection properties.
Set other parameters if necessary.
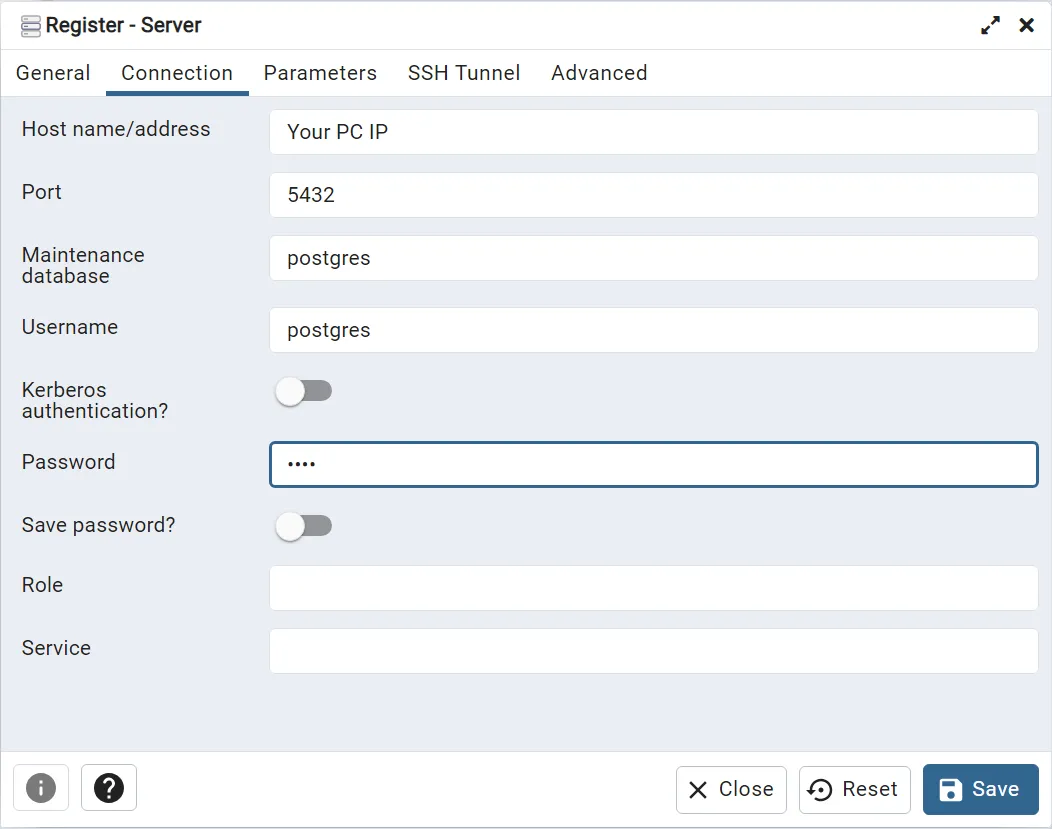
Press Save.
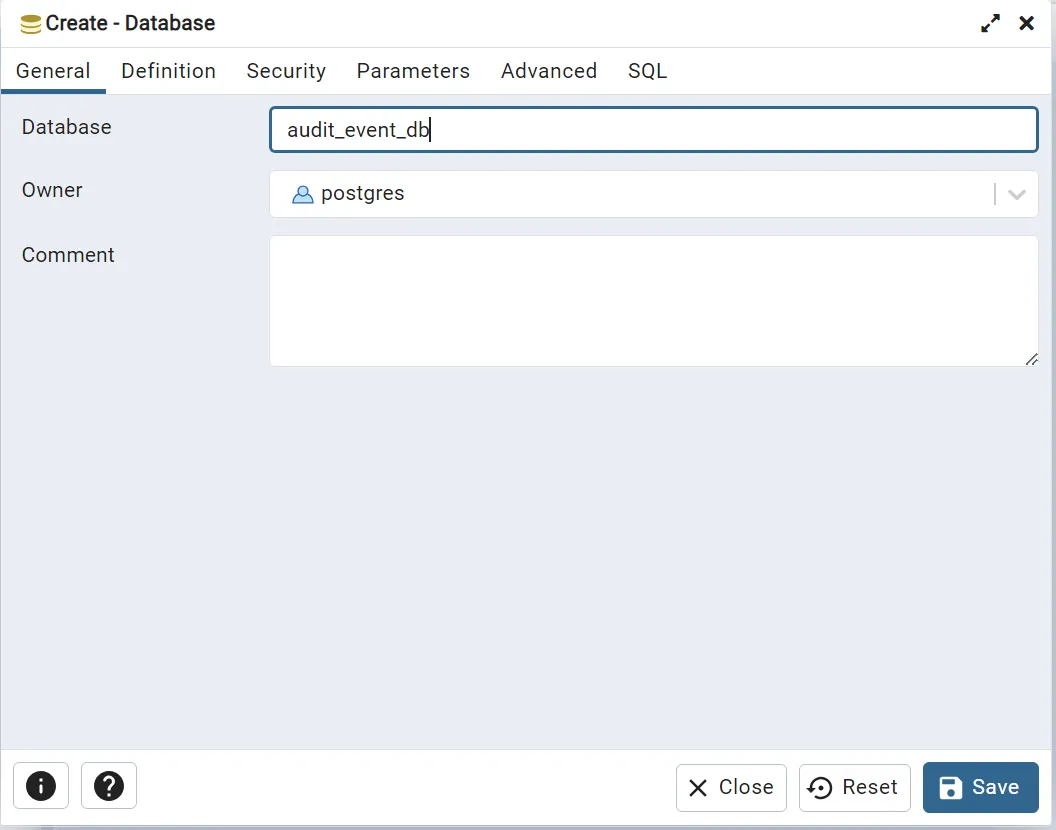
Right-click on the server that was registered. Select Create > Database….
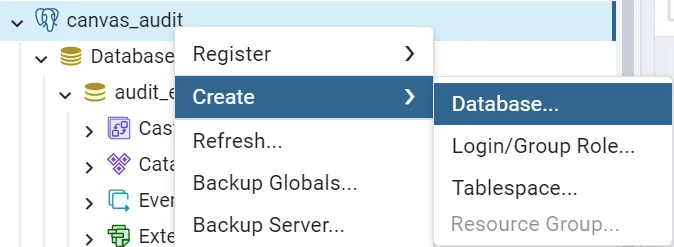
Enter the database name.
Set the other configurations if necessary.
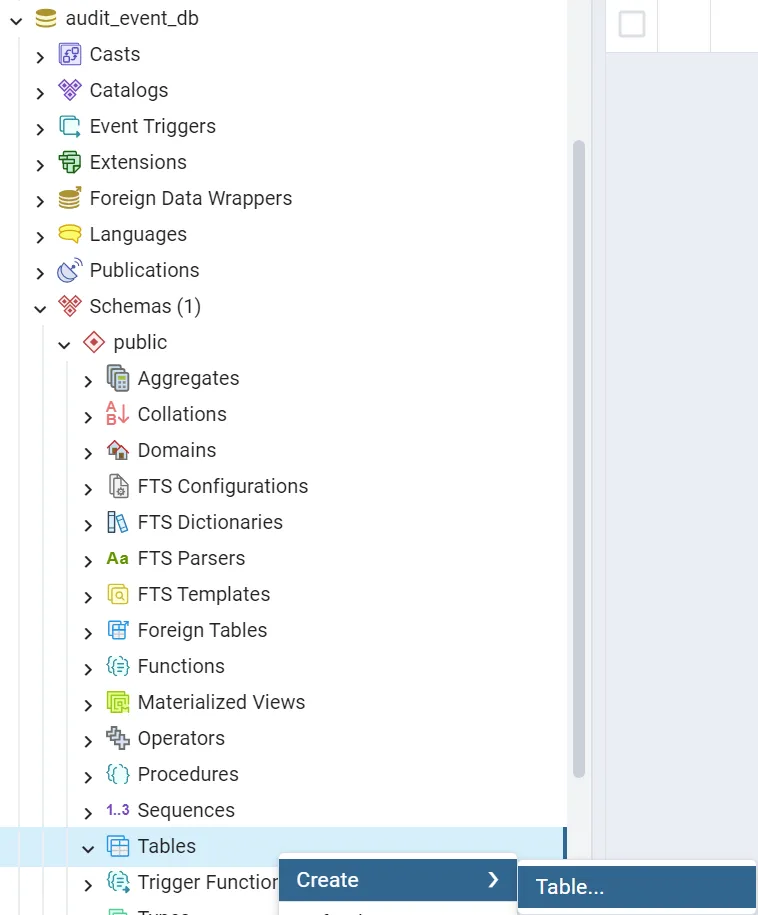
Select and expand the database > Schemas > Public and right-click on Tables. Click Create > Table….
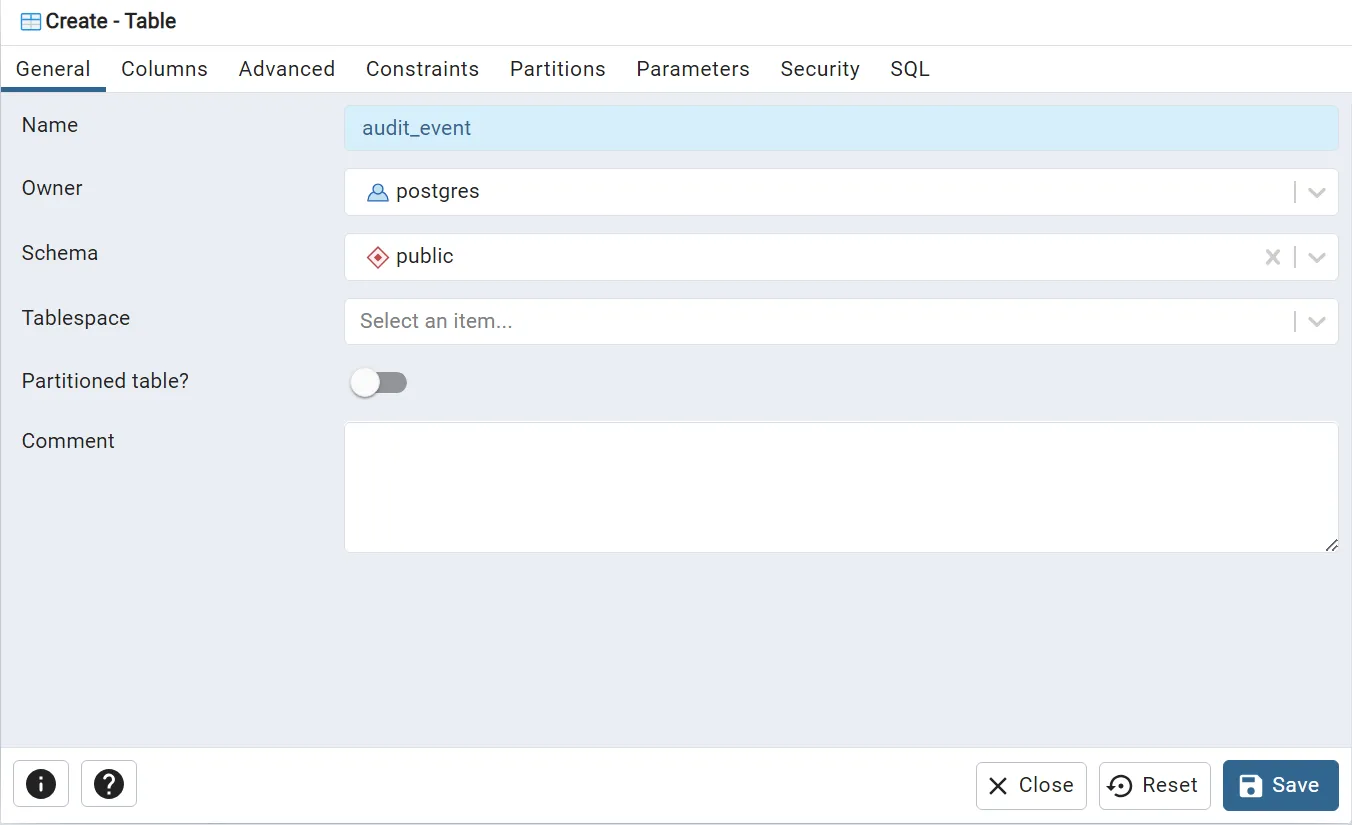
Enter the table name in the General tab.
Set other configurations if necessary.
Press Save to finish configuring the table.
-
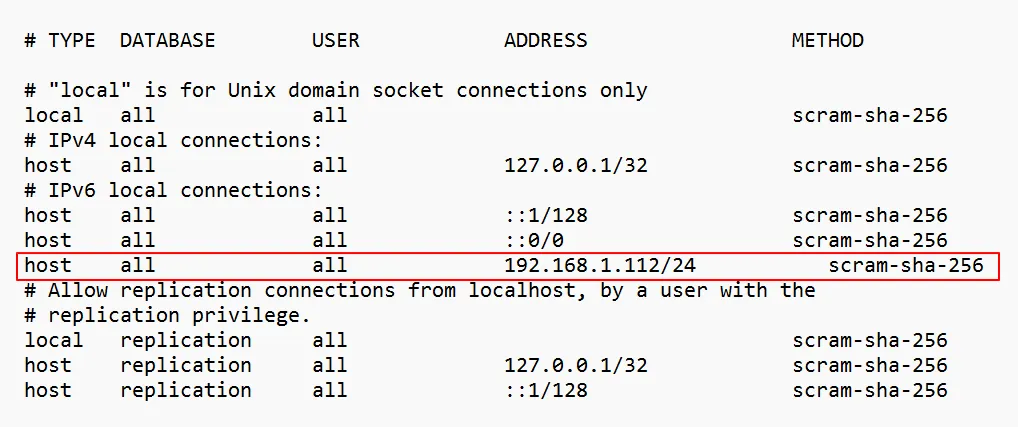
Add your HMI to pg_hba.conf file as a host:
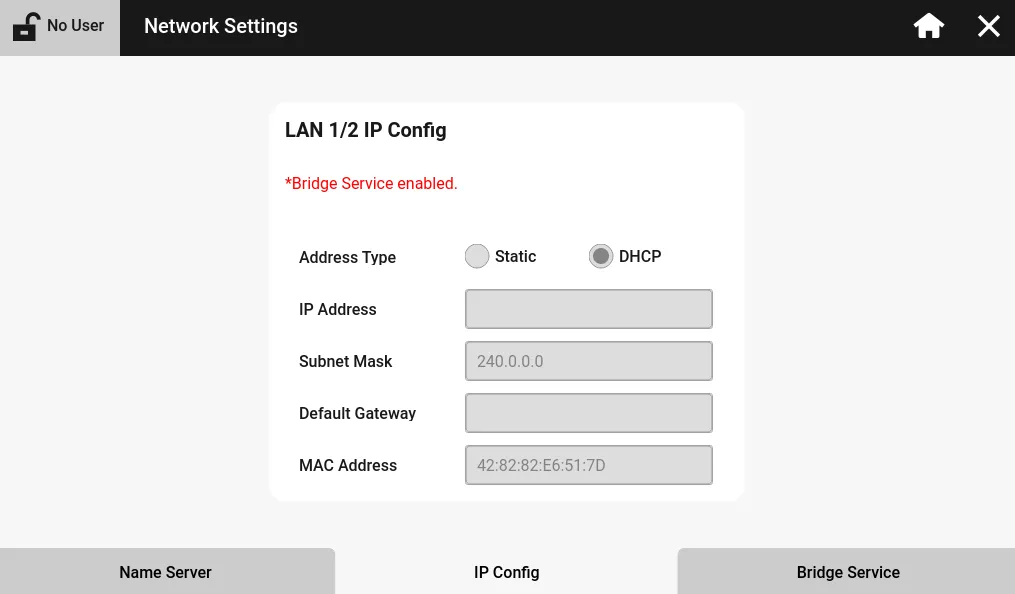
Check your HMI’s IP address and Subnet Mask.
Refer to the Network Settings quick start guide for retrieving your HMI's IP address.
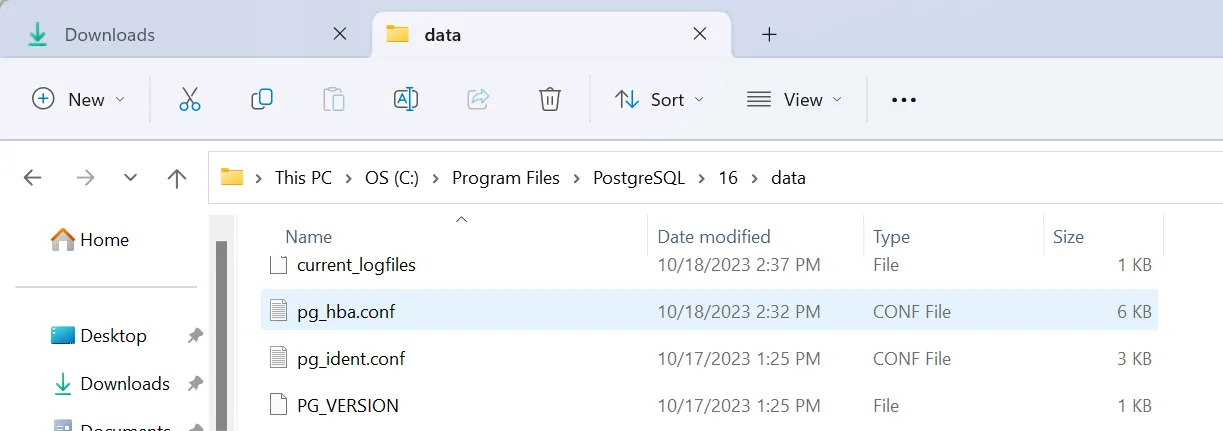
Open the pg_hba.conf file located in the Data folder inside the PostgreSQL installation path folder.
Add your host’s IP address to the configuration file.
Refer to the official manual (21.1. The pg_hba.conf File) for details.
After adding a new host IP to the configuration file, it will look similar to this: