Alarm Introduction
Alarm Feature Description
Alarms communicate and document when adverse situations occur in a project. Alarms can have set values or threshold conditions that trigger their occurrence. They signal situations like a breakdown, malfunction, or reaching set limits. Documentation of alarm contents like timestamp, description, and value is critical for applications. This can be done via CSV generation on the user’s Xpanel with Script Functions.
The Alarm Summary is a runtime GUI object that displays all active, acknowledged, and resolved alarms. Alarms can be organized in Groups and Levels, which can be shown in an Alarm Summary object. When alarms change state, Actions can be added to control operations in the project. Alarms can be configured to track digital values or have analog thresholds (i.e., High High, High, Low, and Low Low).
For more details on alarm configuration, please visit Alarm Information to learn more.
Alarm Designer Functionalities
The following functionalities can be configured in the Canvas software.
Alarm Editor
Click Tools > Alarm Editor to bring up the Alarm Editor window, as shown below:
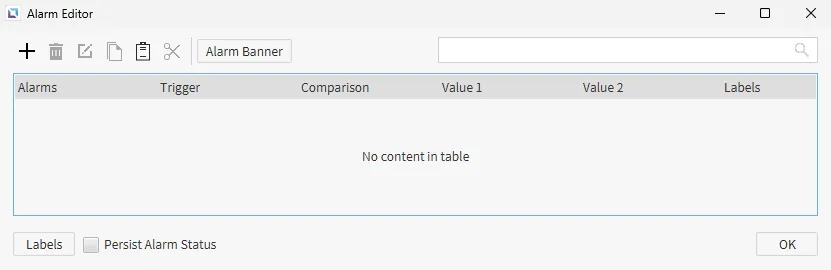
This pane shows all created alarms and their designated names, triggers, comparisons, comparison values, labels, and banner functionality. Users can create, delete, edit, copy, paste, and cut alarms from this window.

Checking the Persist Alarm Status option enables the Xpanel to retain alarm data through the closure of project runtime. Even through the loss of power, alarm statuses remain unchanged.
Add/Edit Alarm
To edit or edit an alarm, click the +, or Add Alarm, icon to bring up the Edit Alarm window.
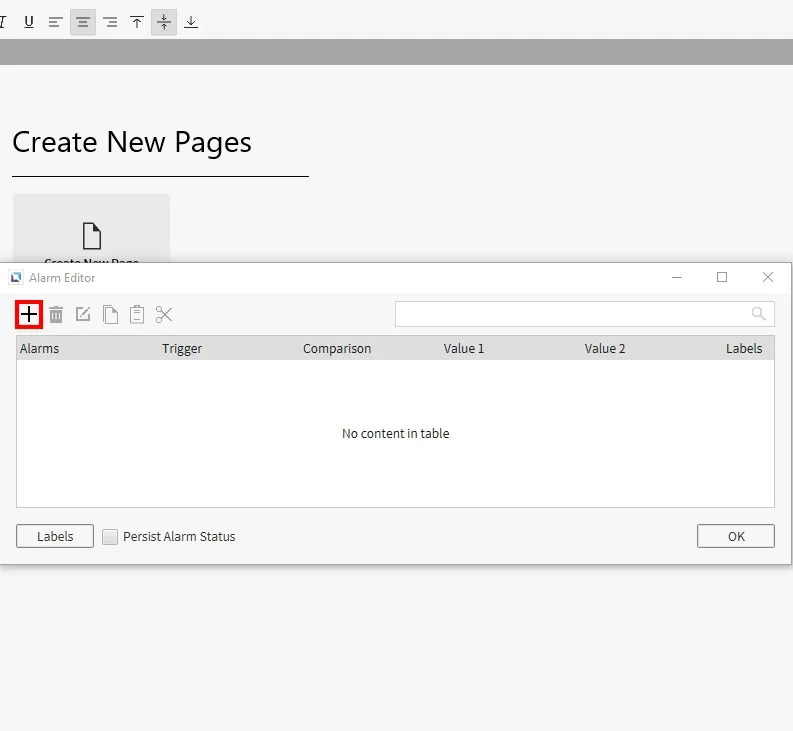
This window contains the Alarm Settings, Labels, and Descriptions tab that users can customize for created alarms.
Alarm Settings
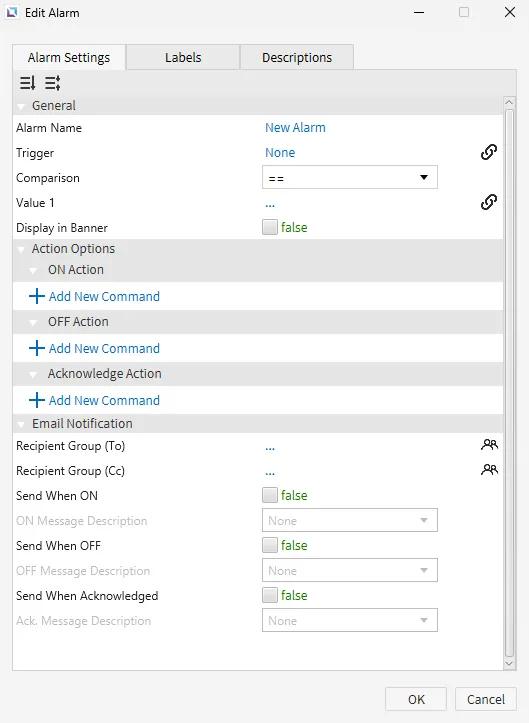
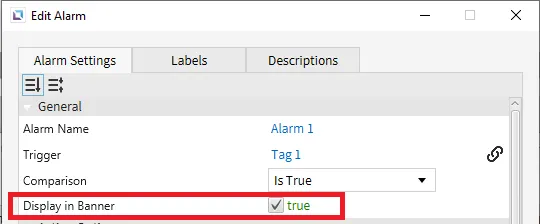
In the Alarm Settings tab of the Edit Alarm window, users can change the Alarm Name, Trigger, Comparison, Value, and Display in Banner fields. Action options and email notifications for ON, OFF, and Acknowledge are also configurable on this page.
Each new alarm must have a trigger and value set before being created. This is the condition the alarm will check to become active. An alarm can be triggered by different conditions, like a tag reaching a value between or outside set limits, two tags being compared, or the value of a Boolean tag changing. By double-clicking the Trigger field or left-clicking the chain link icon next to the field, the Binding Properties window will open where a tag can be selected. This tag may be formatted to be compared and used as a trigger, as shown by the second image below.
Another way to set conditions is by using expressions. The available expressions consist of scaling a tag value, using a Boolean value, or a condition map, and users are also allowed to create custom expressions. These conditions can be set by clicking on the Expression tab inside the Binding Properties window.

Alarm Actions
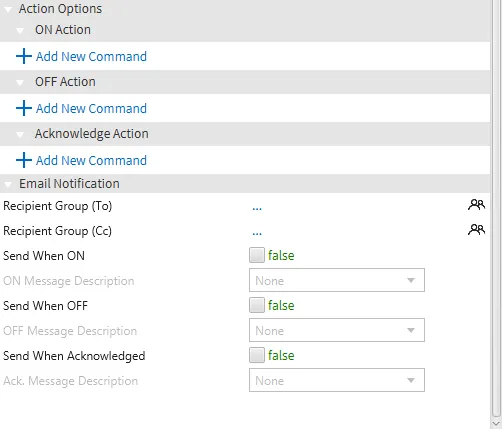
Users can trigger actions in the program based on alarm statuses. In the Alarm Settings tab of the Edit Alarm window, the user can select the event of the alarm to which an action will be added under the Action Options. The ON Action will trigger an action when the alarm comparison becomes true, the OFF Action will trigger an action when the alarm comparison becomes false, and the Acknowledge Action will trigger an action when the user acknowledges the alarm.
Email notifications are configurable for the same triggers and can have descriptions added to them.1
Labels
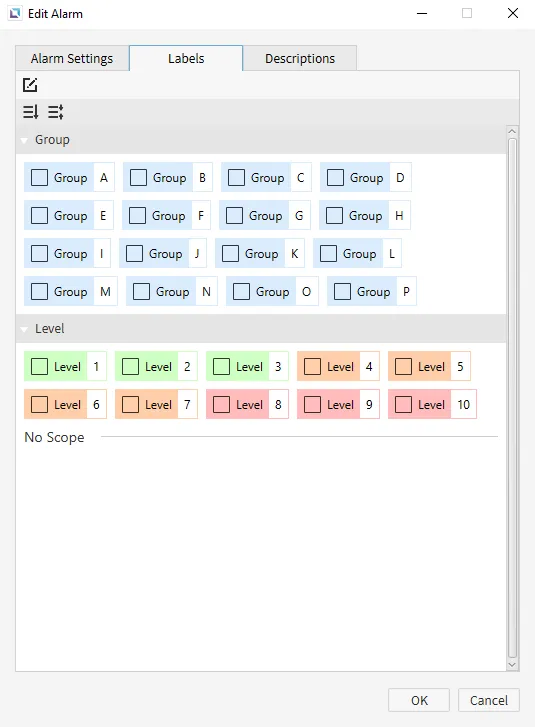
The Labels tab allows users to change groups and levels for alarm organization. There are two default scopes to select from: group and level. Additional labels and scopes can be created by clicking the Edit Labels button. One alarm may have multiple groups and level labels, and various alarms can have the same label. Groups or Levels can be selected by left-clicking the already created label and deselected by clicking the x icon next to a selected label. An example of selected labels and the icon to deselect them is shown below:
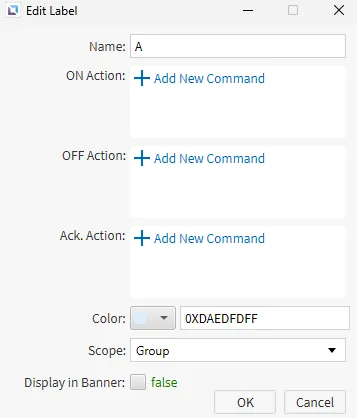
After clicking the Edit Labels button, new scopes and labels can be added with the + icon. To edit an existing label, double-click or right-click the desired label and click Edit Label. Unwanted labels can be deleted by right-clicking the label and clicking Delete, as shown below:
Descriptions
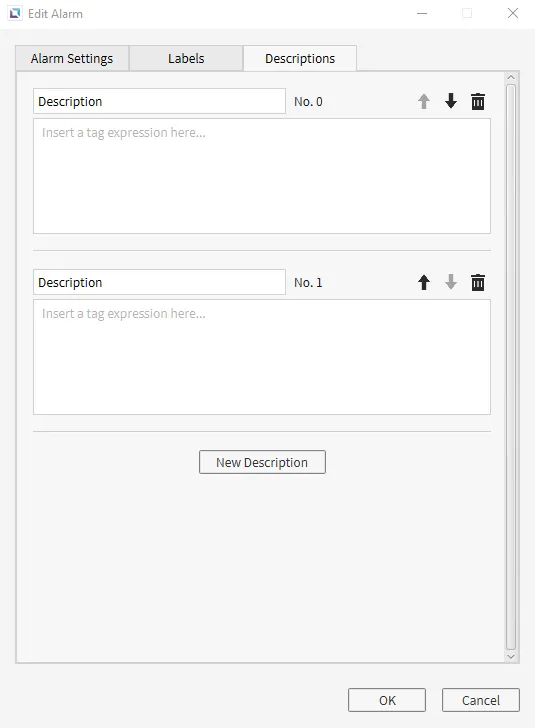
In the Descriptions tab, clicking New Description allows users to create tag expressions for the current alarm. Tag expressions are descriptions that can be added in a new column of an Alarm Summary object and will also show in a generated CSV file. Descriptions will be numbered and can be re-ordered after creation. They will be part of the alarm row when the corresponding alarm is triggered. This is similar to how interest tags are displayed in XpanelDesigner, but a description will be shown here instead of a tag value.
Alarm Banner Properties
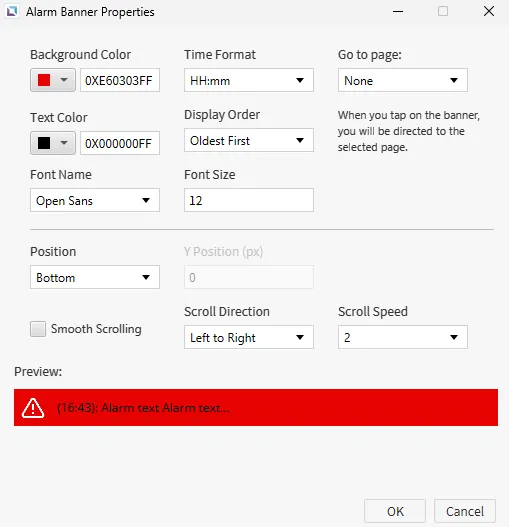
The user can set up an Alarm Banner that will appear on the Xpanel screen and scroll or cycle through any active alarms.
The Alarm Banner Properties window allows users to change the color of the banner, text, font, size, time format, display order, ability to open a page, scrolling functionality, and banner settings. At the bottom of the window, a preview is displayed. If a page is selected under the Go to page: field, tapping anywhere on the banner will open the selected page, where an Alarm Summary object can be shown to display all active, shelved, and historical alarms.
To add alarms to the banner, select the Display in Banner option when creating or editing an alarm or label. When selected, any alarm or alarm under a label, with the option selected, will display on the Alarm Banner when active.

A way to achieve similar functionality is to insert a command in an alarm Action. When the command Send Screen Notification is selected, the user may specify the message sent via the notification at the bottom of the screen.
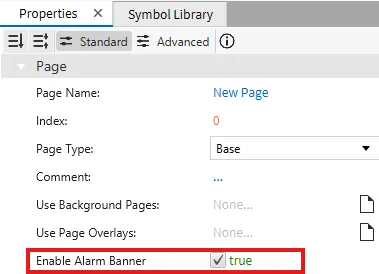
In the Page Properties window, click Enable Alarm Banner to allow the alarm banner to scroll on the current page.
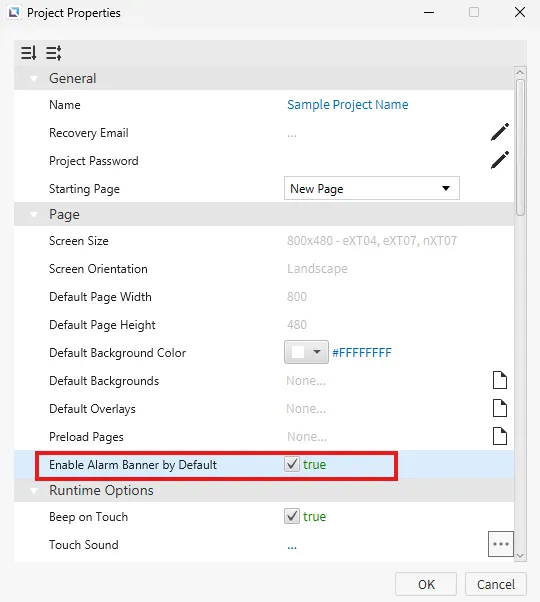
Another option is in the Project Properties window. Select Enable Alarm Banner by Default to display the alarm banner on all pages.
Alarm Runtime Functionalities
Alarms can be copied to a spreadsheet or exported to generate a CSV file.
SpreadSheet Compatibility
Select the alarm(s) to be copied to a spreadsheet. The user can select multiple alarms using the [Ctrl] + Left-click.
Copy ([Ctrl] + [C]) the selected alarms to the clipboard.
Paste ([Ctrl] + [V]) the contents directly into a spreadsheet. Each column stores a different alarm attribute. These alarm attributes match the ones described in the Edit Alarm window. A detailed description of the alarm attributes and their intended functions can be found here.
Edit the alarm(s) in the spreadsheet. Users can automatically create consecutive alarms with a spreadsheet's increment/decrement feature. Note:
Select the rows in the spreadsheet to copy.
Copy ([Ctrl] + [C]) the rows to the clipboard and paste ([Ctrl] + [V]) them to the Canvas Alarm Editor pane. The pasted contents will replace alarms with the same name. All alarm attributes must be copied for Canvas to paste into the Alarm Editor pane.

CSV Generation
The user can export past alarm data to a CSV onto a USB, SD card, project memory, local memory2, or via File Transfer Protocol (FTP) for record keeping.
A CSV file can be created in two ways: creating a command set to Save Alarm CSV or creating a script that calls either of two functions: alarm.createCsv(String label, Storage type); or alarm.createAllCsv(Storage type);. The user can specify the storage location and labels to be saved.
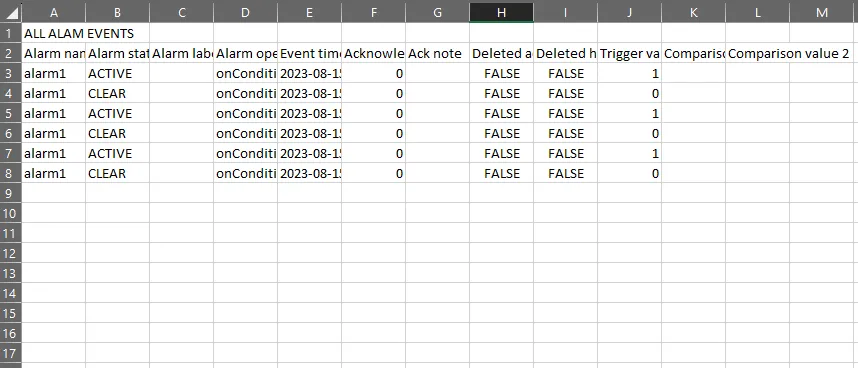
An example of what the CSV file would look like after generation is shown below:

Footnotes
-
SMTP (email) properties must be configured with a valid email address, and users must have an email assigned in Identity and Access Management to have an email sent. An error will appear at the bottom of the screen if an email is attempted to be sent to an invalid or nonexistent email address. ↩
-
Disclaimer: CIMON recommends exclusively using a USB or SD card for storage types. Any CSV creation to local or FTP storage will be restricted if the available storage is less than 1 GB. ↩